

It was a long time coming, this decision to become a fulltime RVer, but now that I have decided for sure, I’ve begun researching. Everything. Everything about RVs and mobile life and communications while on the road. As a writer, I am necessarily a researcher, and it’s times like this when I am especially thankful for the Internet.
Here are some statistics about full-time RVing I was able to find:
- A million Americans live full-time in RVs, according to the RV Industry Association (RVIA). Some have to do it because they can’t afford other options, but many do it by choice. (For me, it’s some of both, plus a desire to travel and see the rest of our country while I still can. And maybe find myself in the process.)
- 2017 was a record for RV sales, according to the data firm Statistical Surveys.
- More than 10.5 million households own at least one RV, a jump from 2005 when 7.5 million households had RVs, according to RVIA.
- Interest in RVing — full time or on weekends or longer vacations — appears to be picking up, especially among young couples. Half of new RV sales are to Americans under 45.
- RV purchases by people of color are rising, according to the RVIA’s 2016 surveys. This represents a change from the 20th century, when white retirees dominated campsites.
So, it appears I am part of a trend. It’ll be interesting to see how this plays out.

A Last Nod to Stationary Life
Meanwhile, a couple weeks ago, I went to after-Christmas sales and bought a display set of three tiny Christmas trees. I only really wanted one, but they came as a set and were really cheap, just $15 for all three. I have always wanted to have multiple smaller “theme” trees throughout my living space, but it’s ironic that I’m just getting them now, right before I begin to pare down my stuff to fit in the camper. But it gives me something to look forward to once I come in off the road (because right now that seems so exciting, I imagine I will need something to look forward to once it’s over, whenever that may be. I’ve committed in my head to five years, but who knows how it will really go down?).
With that in mind, I decided that my Christmas trees of the future will be like this:
- Large, regular-size tree will be my general or generic Christmas theme, containing all the ornaments that don't fit in my other themes.
- Largest pencil tree (tall and thin) will be my Nature-themed tree. I’ve collected many nature-inspired ornaments over the years. I thought perhaps enough to fill one of the smaller pencil trees, but it turns out there are enough to fill this larger one!
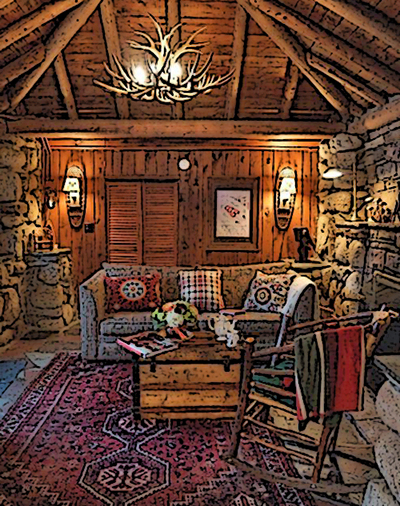
- Medium-sized pencil tree will be my Rustic Lodge-themed tree. When I do come in off the road, I want to build a log home as my final residence. Not sure where that will be yet, but I for sure want it to be decorated like a rustic Maine hunting/fishing lodge (minus all the dead things on the wall—see pic below). So this tree’s ornaments will reflect that. I already have several that would fit on there.
- Lastly, the smallest pencil tree will be my Camping-themed one. Mostly because I don’t have any camping ornaments at all in my current collection. So, to remedy that and and least get started, I decided to make one of my own, before I pack away most of my craft supplies to go into storage. I went for a retro look because although modern-designed trailers are (to me) more comfortable to live in, you can’t beat the cute look of the vintage rigs.
Making…An Investment In The Future
Sorry I didn’t get photos of the whole process, but my fingers were full of glue and messy stuff, and I had to work with drying times. So at the end of this post are photos of the finished product from all angles.
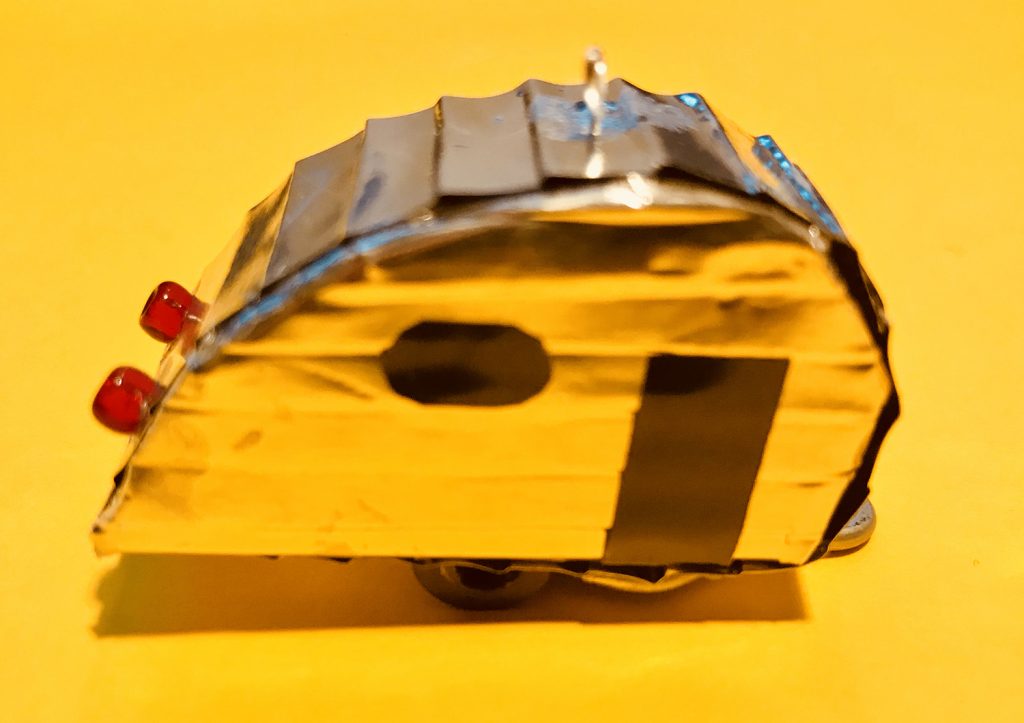
I started by forming the basic shape of a teardrop trailer using plain white Jovi air-dry clay. It’s heavy like Sculpey, but you don’t have to bake it. I wanted that weight to ensure that the ornament would hang nicely on a tree limb. I completed the form in the evening, and set it aside to dry before doing the rest. Working in small snippets like this also helped because I am so busy with work during the day and packing or researching at night.
Meanwhile, I bought a sheet of thin aluminum at Michael’s, where they sell it for scrapbooking. I measured and cut strips of it, then put them through this crimp roller I have for squeezing the last bit of paint out of tubes. Its working surface planes create the perfect pattern to look like the aluminum skin of retro campers.

I then ran the aluminum strips through the crimp roller and cut them to exact size to wrap the clay teardrop form. I left enough extra on the sides to wrap the edges tightly around adjacent planes to get a snug fit. I glued the strips on using craft glue. I first applied the two sides, then the center strip, which wrapped the entire way around the form, beginning and ending on the bottom, where the finish edge wouldn’t show when it was hanging.
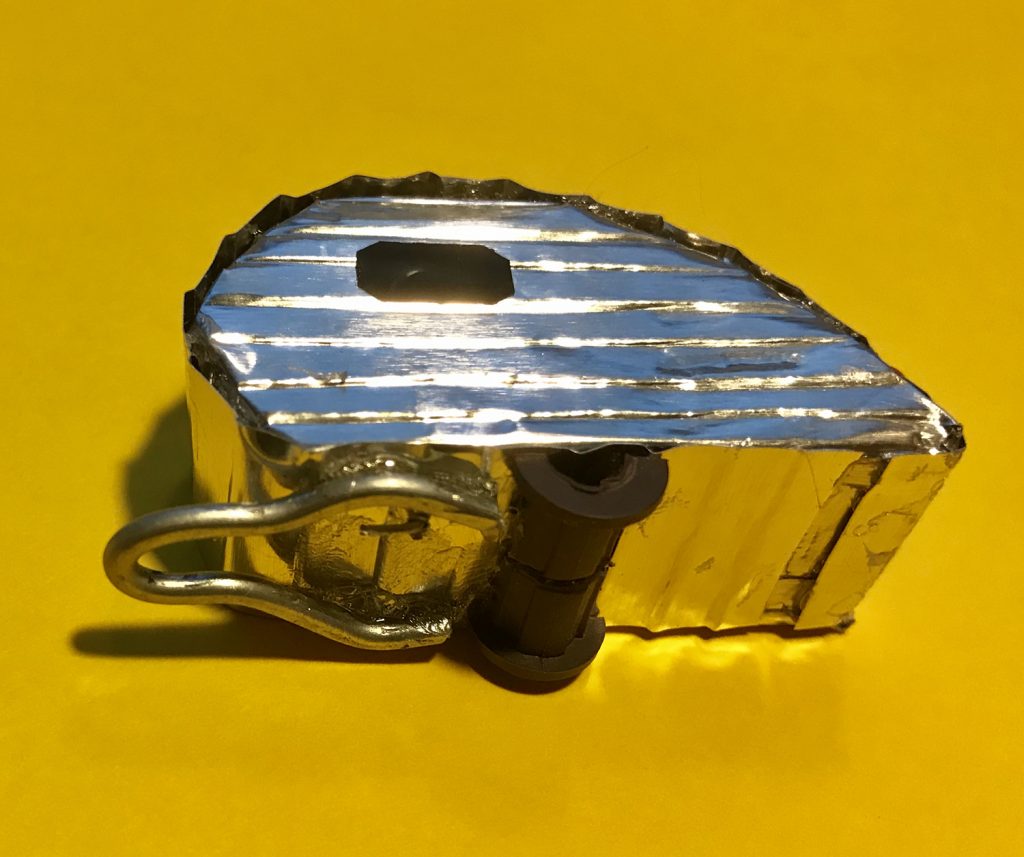
Once the glue had dried on the aluminum skin, I used a small stapler to put one in the bottom to reinforce the glue. I knew that over the years, hanging the ornament would put some pressure on the center wrap, and I didn’t want it to pull out.
On the bottom, I formed a trailer hitch out of some wire and needle-nose pliers, and glued that on using model cement, because I didn’t want any cloudy blobs showing from craft glue. Plus the model cement dries much faster.
Lastly on the bottom, I wanted to form some tires. I had kept a black plastic grommet with a sleeve, which had fallen out of a mini sponge paint roller handle I’d recently used. I often save stuff like that, thinking it may have some use in the future. (There’s a habit I’ll have to break when living in the camper, where I won’t have any place to store stuff like that!) I cut that grommet in half lengthwise, and cut the sleeve down so that when place end-to-end, they would look like tires and an axle. I also glued those into place with model cement.
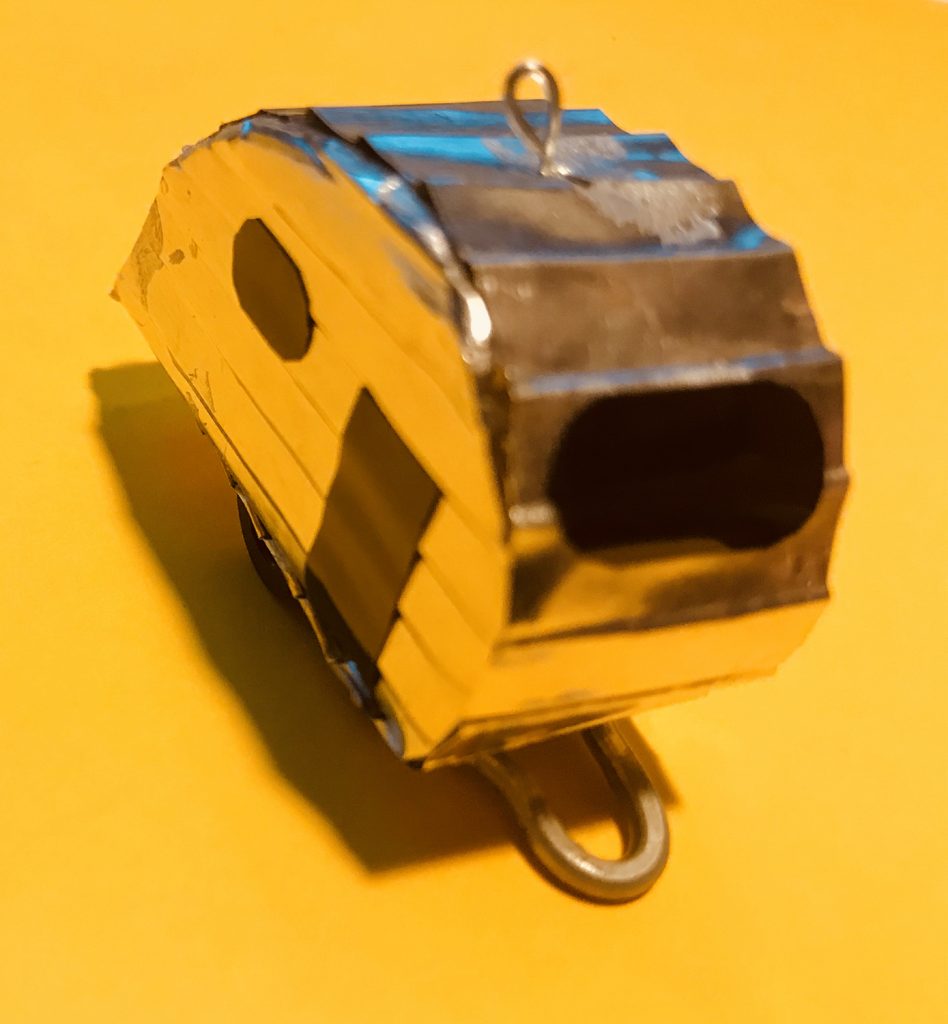
Again, I let that all dry overnight. The next evening after work, I found some black vinyl sign material scraps I had left over from a client job. I cut out little bits of that in the shape of doors and windows, peeled off the backing, and stuck it to the aluminum where appropriate.
As a finishing touch, I glued on two transparent red glass beads to represent taillights. I used a brass eyehook—usually used for beading jewelry—as an ornament hanger.

I lightly gripped my fingertips on the top of the trailer to judge where the center of balance would be, then carefully poked a hole into the top of the ornament with a thick darning needle. (I was careful to choose one slightly thinner than the eyehook wire, so there would still be some friction to hold it tightly in place.) I put a drop of the model cement in the hole and pushed the eyehook down inside.
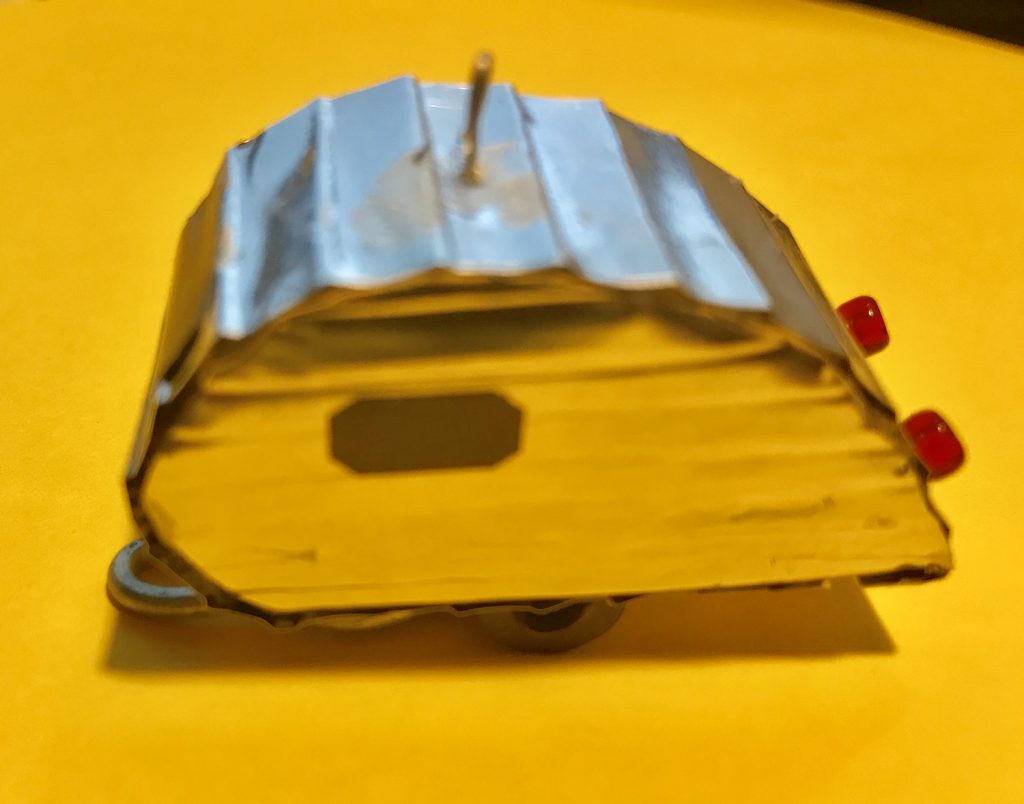
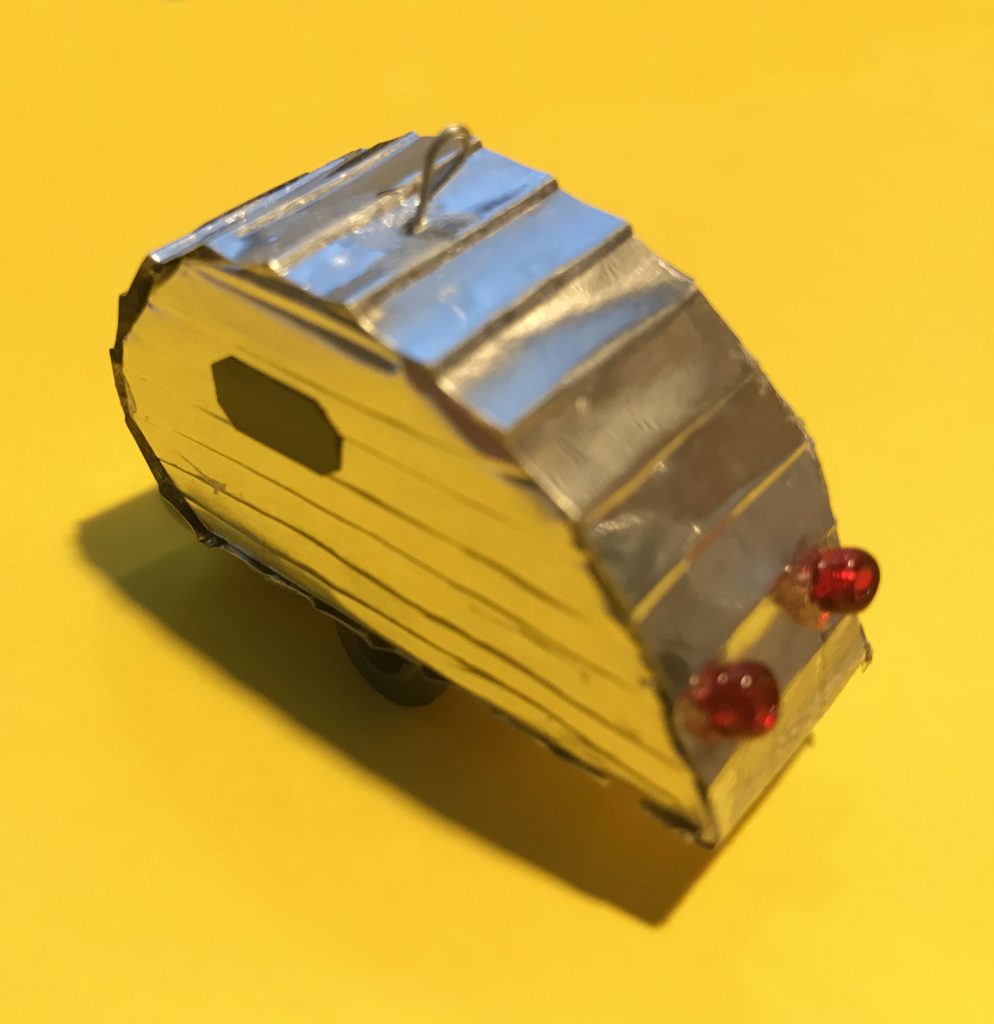
I’m pretty happy with how it turned out, given that it was a first try at something like this. I look forward to once again having a Christmas tree that I can use good ornaments on because I don’t have to take it down and stash it away for travel. But for now that’s a trade-off I can live with.
Full disclosure: I am an Amazon Associate, so part of your purchase through some of the links or portals on this website will help support this site, at no extra charge to you. Thanks for helping me to help you and others by supporting my ability to provide valuable information on how to live more joyfully, efficiently and safely on the road.
Recent Comments