
Last weekend, it was pretty nice out, and I decided to take advantage of the decent weather by getting out into the trailer and beginning the interior renovation. I can’t paint or wallpaper yet without worrying about things being affected by the cold, so I started with a task that didn’t depend on it being nice and warm, just tolerable. I began installing the kitchen backsplash.
Beautiful Backsplash Option
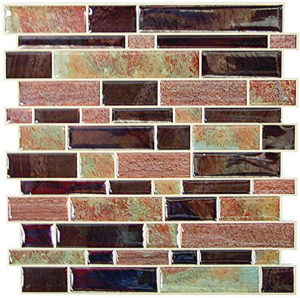
I chose a beautiful, warm Modern Long Stone design from StickTiles, some remarkably well-thought-out, flexible epoxy tiles that look fantastic, like real glass tile. (The colors on the sample shown above are pretty “off,” but you get the idea.) They are:
- easy to install
- perfect for backsplash functioning because they’re water- and grease-proof while being easy to clean
- most importantly — don’t add the weight that real tiles would
I felt the colors would beautifully complement the wallpaper I’ve chosen, keeping the warm feel without closing up the space too much.
First, I cleaned the wall surface well with a wax-free glass cleaner and paper towels. This was the original RV wall that had been painted over with latex. I made sure it was good and dry before I started placing any tile. These come in squares about ten inches or so, with edges that follow the pattern of the smaller tiles, as you can see in the product portal image above. They fit together like puzzle pieces, which is very helpful. It also keeps the repeating pattern from being too obvious.
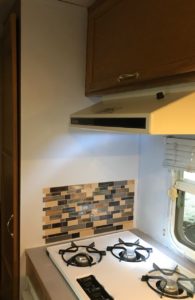 I had purchased two packs to begin with, not knowing for sure how much of the surface I really wanted to cover. I knew I wanted to do the sidewall next to the stove. Based on how that looked, I would decide whether or not to do the rest of the stove and sink surround. I was concerned that too much of it might darken down the space too much. Here’s how it looked as I got the first row nearly completed. This was two full tiles, minus the bits I cut off to make the right edge straight. The tiles come four to a package, at about $20 each, depending where you buy from.
Smart Little Girl
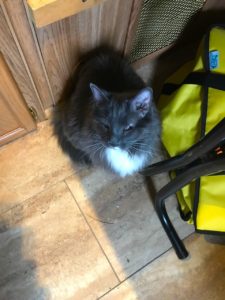
I had decided to use my time working in the trailer to bring Idgie along, so she could get used to being in it. She wasn’t too thrilled at first, walking around crying for about the first hour. Here she is, looking up at me like, “Why must we do this?”
 That was a long time for her to vocalize like that, and it really bothered me to see her so distressed, but sooner or later, she has to get used to what will be our new home. So I watched her closely and spoke in a soft, calming voice. After about half an hour, I noticed a change in her vocalization. It seemed somehow not so distressed-sounding as just a little lost.
I watched as she stopped just wandering around in circles and instead began to appear more methodical as her voice changed. She’d walk a few steps, then cry again, but she no longer sounded lost. A few more steps, then she’d stop and cry again.
I suddenly realized what she was doing: In much the way bats emit high squealing sounds in dark caves, she was putting out her version of sonar pings, then listening for the audio bounce-back; in effect, echo-locating the boundaries of these new, unfamiliar surroundings!
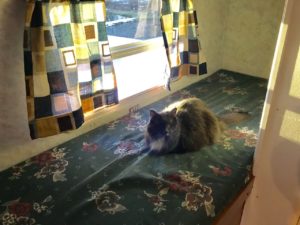 As she always has since she was a tiny, little sick girl I was told would never see her first birthday, she amazed me with her intelligence and courage. Yes, she’s a cat and doesn’t like change. But she’s proven herself far more adaptable than most people I know, and once again was setting about acclimating herself to this new situation that she found herself in. I can’t imagine a trait much more suited to a perfect traveling companion. Here she is an hour later, having satisfied herself that she had fairly well covered the new territory and now enjoying the fresh air from outside while lying on the bottom bunk that will be my bed on the road.
Making Progress
Meanwhile, I continued to place the tiles. I had to measure and cut them to create straight edges along the rear corner wall seam, and carefully place them so they fit just perfectly with the ones already adhered to the wall.
The whole process was easy enough, but nervous-making in that I had to be very careful not to let it stick to the wrong thing or in the wrong spot, as I was placing it before rubbing it down good to make sure the back adhesive stuck well enough to keep it from falling back off.

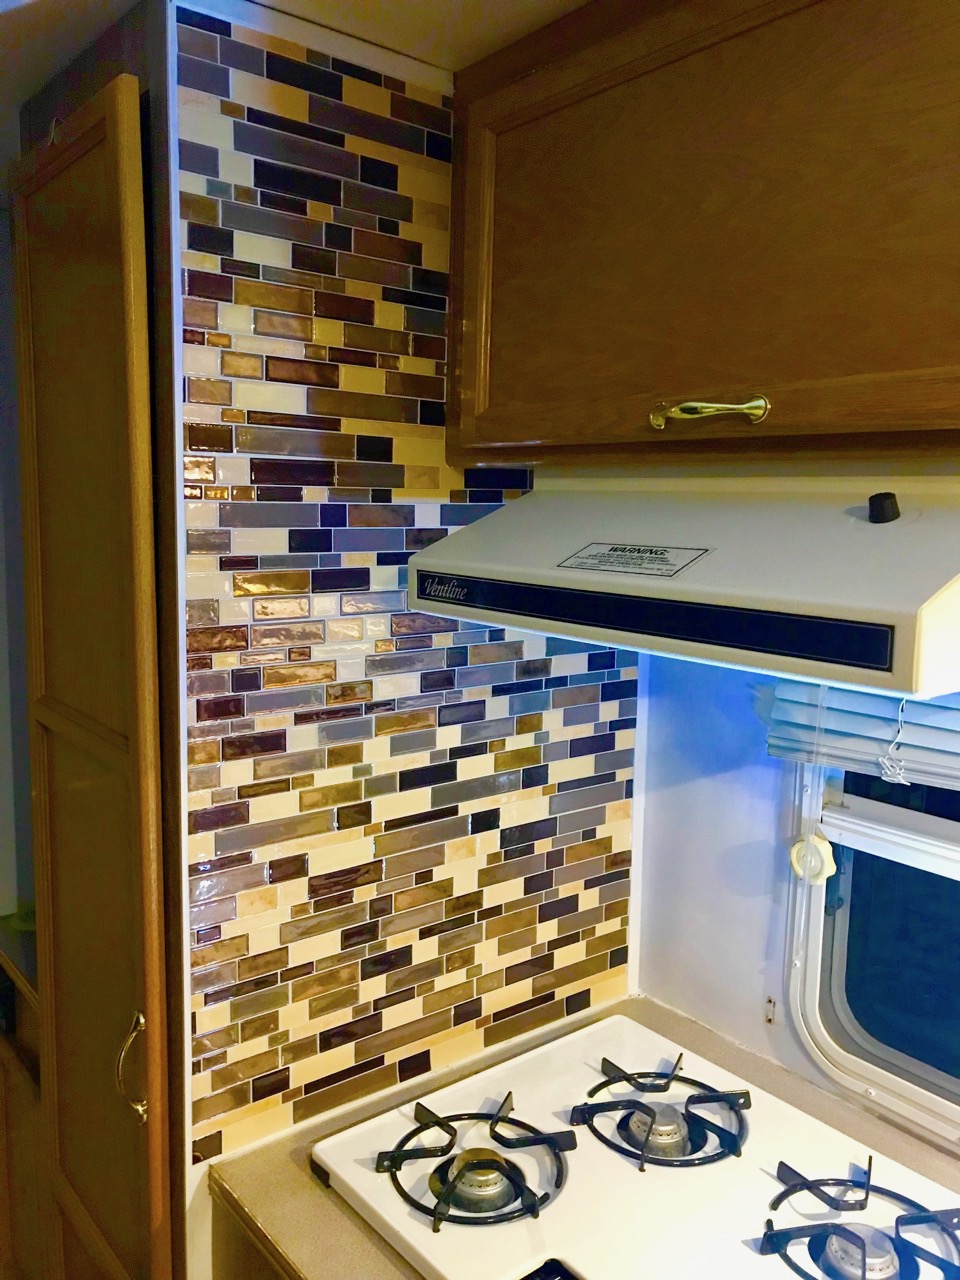
Here’s how it looked at about halfway. By this time, I was feeling pretty tickled about the way it was turning out! I think it looks quite sophisticated. Of course, ignore the blue painted wall—those will be covered with the bleached board wallpaper and also have a warmer cast to them.
Right about this point, I realized I might be cutting it very close, concerning having enough tile material to cover the whole sidewall all the way to the ceiling. I realized if there were any chance of my making the most of it, I would have to start cutting out individual tiles and runs to fill in the area I had left. So I planned each placement very carefully, taking stock each time of what I actually had left to work with.
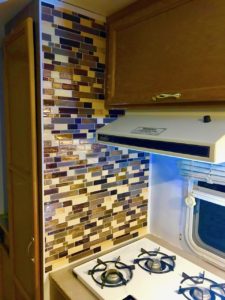 In this piecemeal way, I ended up having just enough tile material to complete the wall all the way up! Whew—what a nail-biter! But it was so worth it. I am very pleased with the way it turned out. So much so, that I’ve decided to go ahead with the remainder of the surround. Since the majority of the remaining area is taken up by the kitchen window, I don’t think it will darken it down too much. But it will look really sharp while protecting the wall from spitting grease and water.
Waiting on Supplies
I ordered two more packs of StickTiles yesterday, and they’re supposed to arrive on Monday. I was hoping for another weekend tiling session to finish it up, especially since it’s supposed to be fairly warm by then again. But whenever they get here, I’ll figure out a way to get it done.
Once all the tile is up, I will go in with a small paintbrush and paint the seam trim a dark brown to give it a really finished, defined look, and my first interior decor project will be finished.
Meanwhile, I’ll use the respite in the weather to address all the exterior lighting. Most of the fixtures have been repaired at some point with black electrical tape, which is not very attractive and sooner or later will loosen or unwind and allow water intrusion.
That’s simply not acceptable, so I’ll remove that, and replace all the remaining incandescent bulbs with LED ones, to make them all brighter and more power efficient. Then I’ll either repair or replace the damaged fixtures in a way that is visually appealing. If I’m gonna be living in less than 100 square feet, I’m going to do it in style!
DISCLAIMER: I am not being paid to feature any specific products in my blog posts. I share product information for whose who may want to use them in your own RV or other home. I do offer Amazon portals that allow you to purchase them easily, as I did. As an Amazon Associate, I will make a very small commission if you buy through these portals, but the purchase won’t cost you anything extra. I only feature products I have used myself or that I have personally seen successfully used by people I know. If you do choose to buy through these portals, please know how much I appreciate your support.
That tile looks great! It really changes the look of the kitchen — very on-trend.
Thank you! Spoken like a true Realtor! 😉
I concur – you did a great job and I love the color scheme you picked out. I also love reading your blog – I’m living vicariously through you! Keep up the good work. Would love to visit with you soon. ❣️❣️
Ditto, Michelle — we need to catch up before I leave! Give me a call and let’s do lunch. 🙂 And thanks for your kind words! I’ll try hard to keep the blog interesting and exciting for you.
This looks awesome, Mary. Really enjoying watching the progress. And I’m happy to know Idgie is adjusting.
So am I, Barb — and relieved! Thanks for your kind words about the ongoing reno!
Oooo, this looks maaaaahvelous! Mom would be proud of your innovativeness. ❤️
Thanks, Beck. I think so, too. 🙂