
Last Friday night, I really needed some time in the rig. So many ideas were swirling around in my head about things I needed to get done before the following weekend, when I was supposed to take Wildheart on her maiden voyage. The wintery weather forecast put the kibosh on that—she’s not outfitted as a four-season rig, and I don’t yet have enough experience to improvise. So I’ve rescheduled that for the first weekend in June.
So, I took a bottle of red wine and a glass out to the parking lot with me. This was the closest I was going to get to relaxing all weekend, and I wanted to make the most of it.

First Things First
I knew I wanted to start painting, but first things first: There was some wiring I wanted to move around.
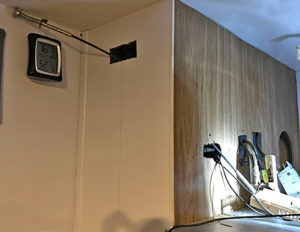
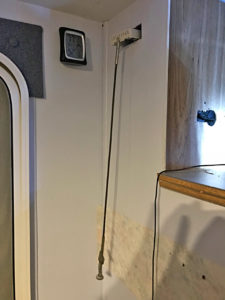
The original over-fridge shelf at one time had a stereo radio/cassette system in it. I know, because the crank-up antenna is still there. But the stereo was long gone. So, like the speakers, the antenna was no longer useful, either. But it’s installed in the ceiling/roof, and I’m no idiot: I don’t mess with that unless there’s no choice. You seriously do not want to mess with anything that is situated where it passes through the roof, unless you really know what you’re doing…and that category does not yet include me. So that antenna riser control is staying put, though I did remove the crank and spring assembly that stuck down from the ceiling, because it would have interfered with the way I want to use the over-fridge spot.
What I am doing with that area is planning to enclose it, to use as a small food pantry. Right now, food storage is at a dearth in the trailer, so I’m needing to be resourceful. I decided to build it right around the crank, enclosing it so it’s no longer visible, while creating more storage. Yes, please!
One Thing Leads To Another
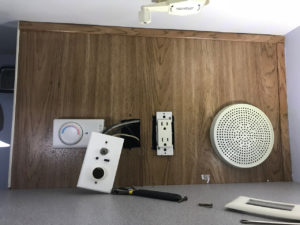
But first, I would need to remove the second useless stereo speaker, and relocate some inconveniently placed aftermarket items along the wall in back of it.
There was a 110v grounded double receptacle. That would come in handy when I installed the flatscreen smart TV and a Roku box on the wall between the fridge and my bunk. So I decided to move the receptacle there. That would have to wait, however, until daylight, so I could see well without having to keep the battery hooked up. Safety first, and I had no intention of electrocuting myself. So, I simply unmounted it from that thin wall above the fridge that enclosed the wire chase for the fridge, the furnace, and some other mechanical items.
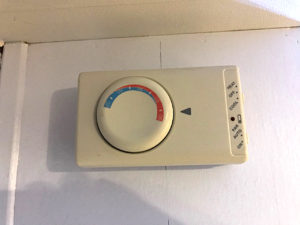
Secondly, I did the same with the 12v DC bayonet-style outlet and switch that had been installed next to the 110v receptacle. I also needed to unhook and move the control box for the furnace. The former would also have to wait for the safety of an unhooked battery, so it, too, would move behind the furnace controller in priorities until morning.
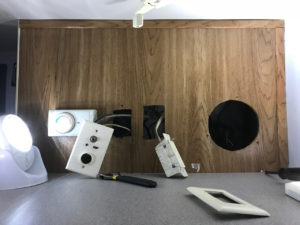
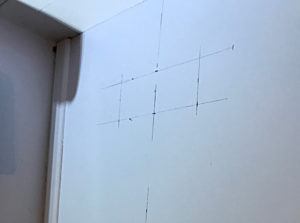
 Finally, after removing them all from the wall, I measured and outlined a slot just large enough to fit the still-attached-to-wiring controller. I made starter holes with my new heavy duty cordless drill (which I love and feel is one of the best tools I’ve ever owned) and a very small bit (is there anything that makes one feel quite as competent as drilling a good hole?).
 Relocating Electrical Controls
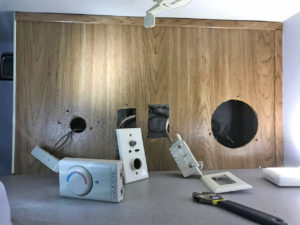
I chiseled out the piece using a dead-blow mallet to make the hits. That was quick work, then it was time to capture the controller and pull it through the slot, so I could avoid having to remove and then reattach the wiring. Yes, I’m lazy.
 I wasn’t sure how that was going to work, so I went back inside and brought two potential tools: A wire coat hanger, which I could bend and use as a sort of fish tape if my first option didn’t work.
 Tht first option was a long, flexible claw grabber like I’d had way back when I was 18 and a fledgling auto mechanic. That was another life, but I’m glad I had replaced that tool and still had it, because it worked like a charm.
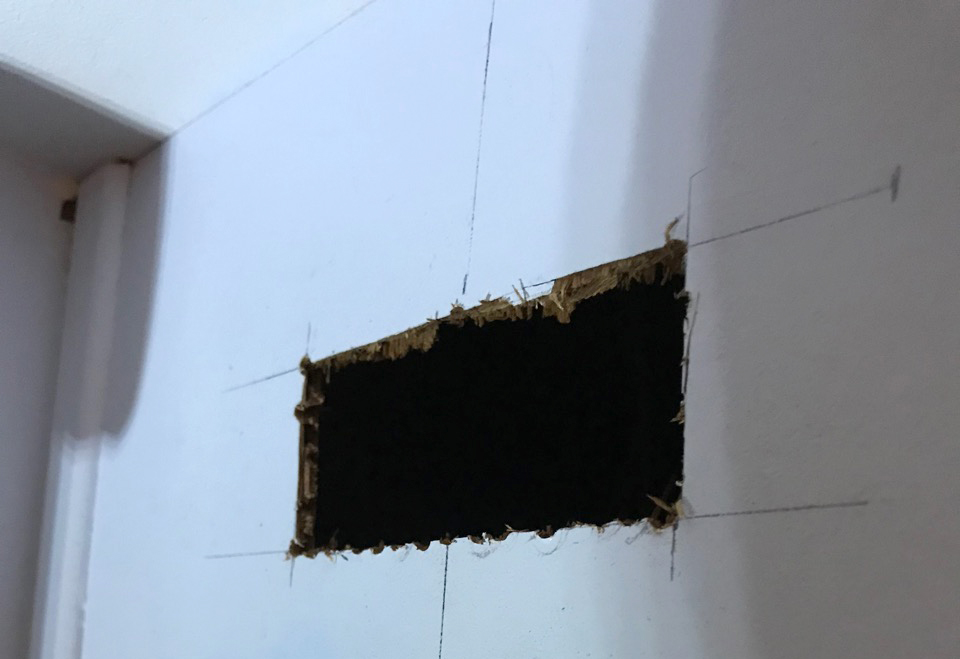
I don’t have a plunge saw, so I created starter holes with the drill to create a cutout. I could have used a small, handheld saw blade to cut it out, but to me that seemed like inviting trouble regarding existing wires behind the wall. So I ended up just drilling many holes close together, which seemed less threatening to the wiring, then punching it out with the dead blow mallet.
I was thrilled when it went very smoothly, nothing dropped off or got caught up in the spaghetti of other wiring behind the panel, where I wouldn’t have wanted to have to access at night.
IMPORTANT: I worked as hard as I could to locate, isolate and avoid drilling or cutting into the existing wire harness in the chase, or to pierce the walls of the refrigerator or freezer. However, I must admit that not being able to see everything back there either because it was just too dark and I couldn’t get a light in to illuminate the affected area, or because it was simply inaccessible to anything but the drill bit from through the wall, there were some times I was working blind. I don’t recommend this, but for me it was a calculated risk that I was lucky to come out on the positive side of.
Your mileage may vary, so be aware of the risks you are taking. If you drill through any wiring, you may take out an important element or even expose your rig to later fire because you might compromise the wire jacket and cause a short. If you drill into the fridge or freezer, you can render it unusable and have to buy another one, in which case you could be looking at around $1,200-2,000. Just know what you’re putting at risk, and ask yourself if you can live with it.
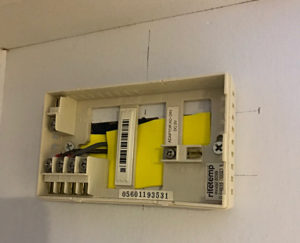
I screwed the housing onto the wall, using a scrap of craft foam as a kind of insulation to cover the hole that went through to the wire chase. The chase has a venter plastic cover, which exposes the interior to outside cold and winds. Though I know it won’t completely insulate from that, I wanted to give it my best shot and not just invite that stuff in. Besides, it was a fairly easy, fast and cheap bit of proactivity I could take. When you’re redoing an RV, there is so much that’s truly out of your control unless you’re an engineering genius with serious carpentry chops, that you tend to exert whatever positive control you do have, however paltry and inconsequential it may seem.
 That finished, I was done for the night, along with almost the entire bottle of wine. It had been an enjoyable, productive evening. Carly Simon had serenaded me for the past hour or so, as I got ahead of the RV renovation game. I headed in to work on this blog, and get ready to move the other two outlets the next morning.
I’m loving these updates. I even go back and re-read if I can’t follow the wiring explanation the first time around. It’s like being part of it.
Thanks, I’m glad you’re enjoying it! I don’t know how much detail is too much or not enough, but I promised I’d post my whole journey, and this is part of it. So I just basically write what went through my head while I was working.
Looking good Sis ???????????? not to mention the reward and satisfaction in customizing her yourself . So . . . I can expect to see you in WI when ? Don’t be in too big of a hurry, we just got 9 inches over the last two days and she’s a blowing & snowing like a mother right now with more on the way .???????????? Xoxoxo
Thanks, cuz! Not really sure when I’ll be out your way, but I will def let you know. It won’t be too long — there are lots of folks I wanna see out that way. 🙂
You really are the HandyBabe!
Thanks Boss Guy! I really love working with my hands. I’m no electrical expert — everything I understand about it is from my seventh grade science class and whatever I’ve picked up since then. But I know enough to respect it and be careful with it, and one thing about electricity is that it follows certain rules, so it’s pretty straighforward once you understand the basics of series and parallel circuits (which I still have to think about!).
You are awesome. I would never attempt wiring. Great job. Looking forward to new post.
Actually, it’s not that hard or scary once you understand the basics of how electricity behaves. The scary part was cutting into that bunk wall when I wasn’t sure what was behind it. That could have made a huge mess! I just lucked out on that one.