
Another of the smaller, but quite important, projects I’ve accomplished recently is the installation of the proper kind of battery—or, in this case, batteries—for full-time RV living.
The trailer arrived with a marine starting battery for its 12v house power. (12v is the type of power you get from your vehicle’s cigarette lighter. It’s DC — direct current — as opposed to AC — alternating current — that you get from your house’s 110v outlets.)
Now, a marine starting battery will do the trick for a short period of time, and it’s fairly easy to charge even if you don’t have a way to hook up to shore power (which is what it’s called when you plug in your RV’s power cord to a park pedestal or someone’s 110v electrical outlet (using a 15 amp adapter because my rig requires 30 amp power). But using a starting battery is not a sustainable way to power a travel trailer, because those batteries aren’t meant to be deeply discharged and recharged over and over again.
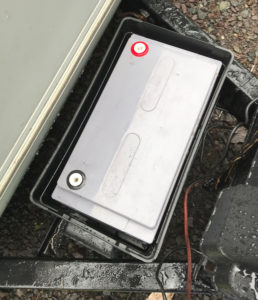
One of my Renogy 100ah AGM batteries
Hence, the name “deep cycle” for the type of house battery you really want, which is designed to be discharged as low as 50% (never more, and you should avoid going that far if you can, to keep from damaging the battery), then recharged through another power cycle before being used again. And in my research, I learned there are several ways to approach this issue.
One would be to simply replace the single 12v starting battery with a single 12v deep cycle battery. That’s what a person overly conscious of vehicle weight would have done. It’s what I wanted to do, but knowing how much I’ll be using my battery, I opted instead to replace it with two 12v deep cycle AGM (absorbent glass mat), 100 amp hour batteries.
I did this for two reasons:
- I’m eventually going to want to hook up a solar panel system to help recharge the batteries, and these AGMs are a great solution for that. They offer long life with many cycles. They are sealed, so they cannot spill when going over rough roads and never need maintenance such as filling with distilled water, which you must do with regular liquid cells.
- I wanted longer amp hours. Since I can only run each battery down to 50% before recharging, I would only have 50 amp hours available with one 100AH battery. So I got two, and have them hooked up in parallel.
Batteries in parallel
When you connect two identical batteries in parallel, you double their individual output capacity, while keeping the output voltage the same as either battery. So, what I ended up with is the equivalent of a single 12v battery with an actual 100 amp hours available to use.
If, however, two identical batteries are connected in series, the output voltage is doubled but the output capacity is kept the same as either battery. Because 6v golf cart batteries are so rugged, with very thick metal plates inside that are really durable, many RVers will hook two or more of those up in series to equal 12v power, and have a lot longer service life to show for it. But those buggers are hella heavy, and staying under my towable weight limit really is an issue, so that wasn’t an option for me with Wildheart.
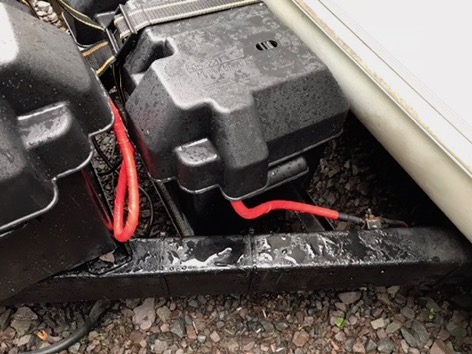
Because my trailer has a rather limited-space hitch tongue, it only came with one battery platform, nestled between the two side members. I had to get a local guy to weld a couple brackets on in front of that one, to accommodate the second battery. He did a fantastic job, very quickly and reasonably priced, even finishing it off with a complimentary paint job! I felt very lucky to have been put in touch with him by my friend, Rose. (Thanks, girlfriend!)
The nasty old battery box had to go.
Exterior batteries generally tend to be housed in, at the very least, a protective black plastic box, to keep the from the worst of the elements. This is the original box that housed the battery it was delivered with. Aside from being pretty beat and with a rusty top vent stack (which I wouldn’t need, because AGM batteries aren’t vented), I replaced it because the two AGM batteries are taller, and wouldn’t fit. So that required that I get two new ones. Can’t say I was sorry to get rid of this ugly thing.
I also had difficulty finding cables of the right length in red and black to attach the two new batteries, so I finally just got two black ones, and wrapped one in red electrical tape. It got the job done, but of course the next week, I found affordable red ones nearby at an obvious place I overlooked.
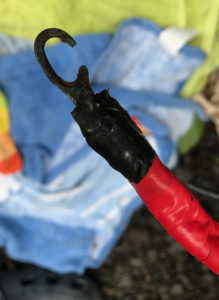
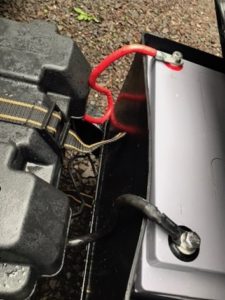
The original positive battery cable had a severely deteriorated cable.
I also had to replace the original positive cable, because the connector had seen far better days, and was causing inconsistent circuits. So that was a second one I had to wrap in red.
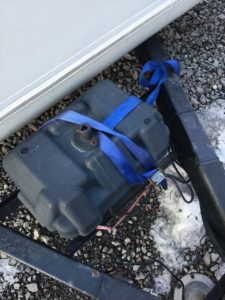
And here is the finished product, which should keep me rolling for quite a while. It was great to be able to check this major project off the list, since so much else depends on it (such as lighting, cooling, and eventually, heating).
During the recent spate of very hot weather, I was able to hook up my new Boundless Breeze fan while I was working inside the trailer, for which I was so grateful, and that couldn’t have happened without first getting this battery situation sorted out.
Next up: Interior Electrical
Recent Comments