
One of the fun things about Wildheart being my first RV is that everything about it is new to me, even though it’s 22 years old. And that means I get to explore all its newness and discover things. Isn’t that one big reason we do this kind of life in the first place? So my exploration began already, before I’m even on the road.
One of the things I discovered was that underneath the front deck, behind the center bench of the U-shaped dinette, is a BUNCH of wasted space. Wasted, because it’s covered beneath a permanently affixed top surface, which I first started eyeing because that surface is clearly too thin and flimsy to support much. I realize that in regular camping concepts, it wouldn’t need to support much. But in a fulltime living situation, every single space must earn its keep.

So, I'm planning to remove that flimsy, warped top panel, which is 1/16" luan wood, and replace it with 1/8" luan. That’s double the thickness, plus it’s going to get painted, which will reinforce it with a top coating that will also make it water-resistant. I’m going to make that into a removable top, which will turn that previously wasted space into usable storage. Not only usable, but beneficial, because I keep hearing and reading how the majority of your weight in a towable rig should be over or in front of the wheel axles, for balance and to avoid sway.
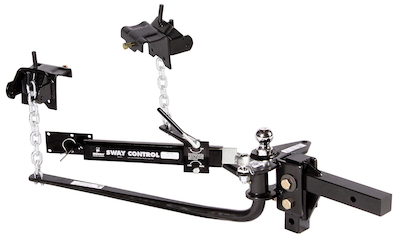
Now, I will be using an anti-sway and weight distribution hitch, which is great. That should take care of the majority of those issues, but why not start out ahead of the game? So I will be storing in that space books and paper and other smaller but weighty items, along with some movie DVDs.
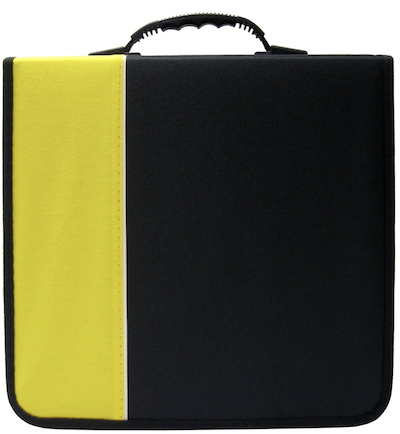
The majority of those, I pulled out of their original storage cases and put them into a cool zippered binder case full of sleeves. I have slipped the discs into the sleeves and can page through them like a book when I want to watch one. Between viewings, the zippered case keeps them dry, safe and out of the dust. Eventually, I will rip them all to disc or thumb drive, but for now, my favorites are coming with me this way.
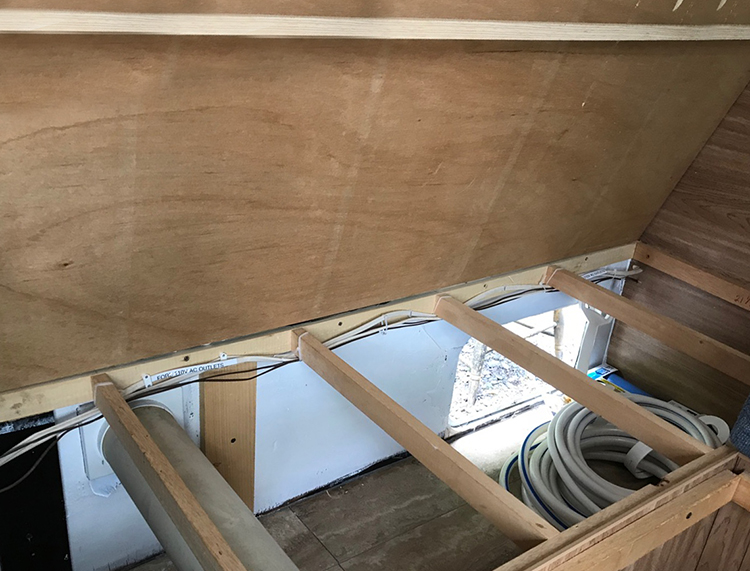
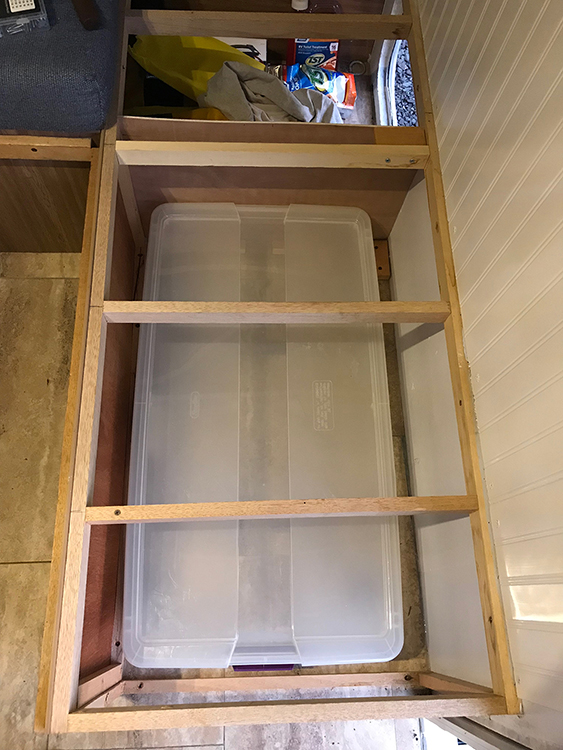
So, if you look at the photo at top, you can see the space I am dealing with. I actually cover how I built that out in a separate post, but for the purposes of this post, I want to show how I insulated it. Obviously, it started as a complete pass-through to that outer storage bay, and no WAY did I want all that cold air and dust (and even critters!) coming up through into my living cabin. So I put in a floor/ceiling panel (floor for the top of the bin, ceiling for the bottom) at that crossbar, and started insulating from there.
I did this with both the pass-throughs on either side of the center console, which both went clear to the floor of the rig, then moved on to the storage bays underneath the bench seats. I wanted to insulate both the outside walls and the floor, plus the underside of the bench seats themselves. Who wants to sit on a cold seat, or feel a draft flowing in from underneath? Not me!
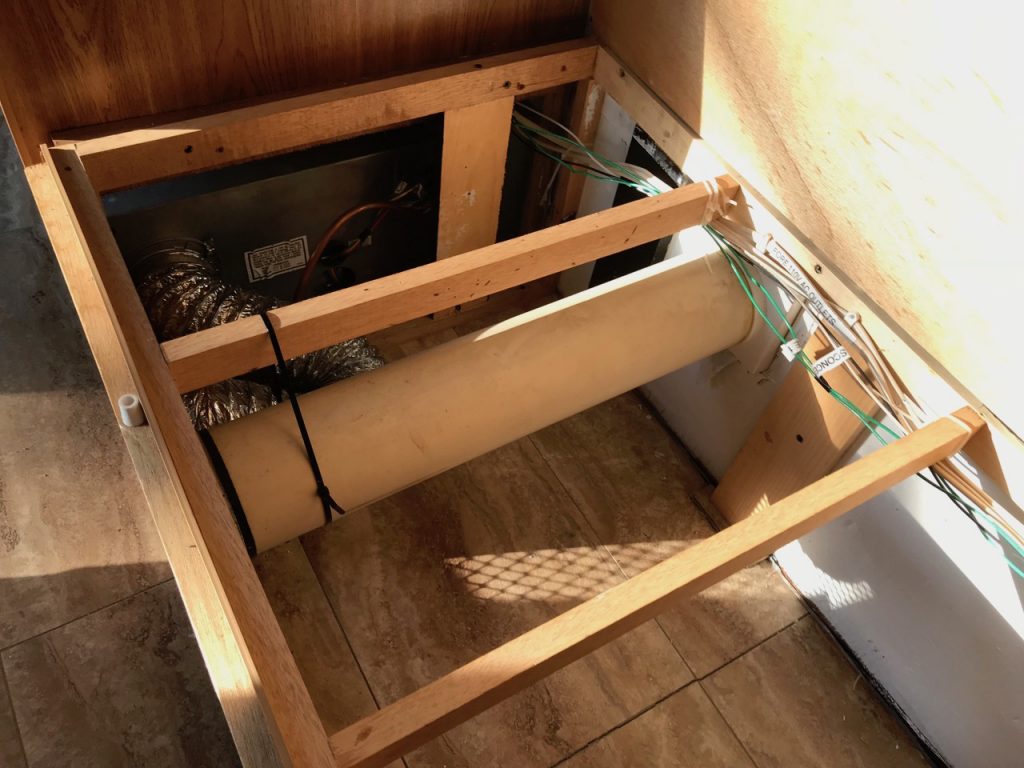
On the port side, I first had to deal with securing a 6" PVC pipe that was originally the stowage for the black tank hose or “stinky slinky.” But when those hoses became standardized to their current larger size, they no longer fit inside that. I suppose I could have covered the outside open instead of just having the cap and just removed the tube, but I rather like having it there. It made an ideal storage tube for my machete, which I carry both for brush-clearing and personal protection purposes.
So I left it in place, and used large zip ties to secure it beneath one of the wooden seat crossbars. That will keep it from flopping around and possibly displacing any wiring or insulation I install under there. You can see it in the photo below, along with the 12v wiring I ran from the front deck power ports.
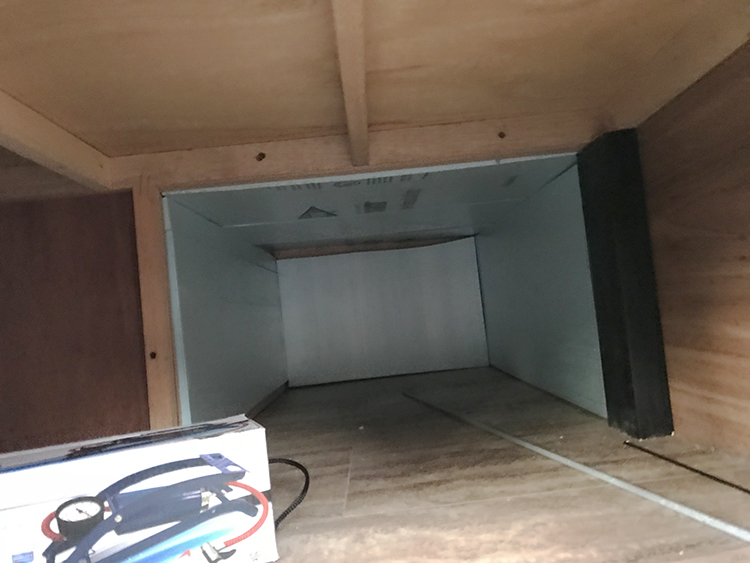
On the starboard side, there was also a storage bay at the fore, but no tube going across overhead. So I was able to use this side differently. I installed a 1/4" piece of luan (from a scrap I had from another project) on the fore side of the second bench upright, dividing the storage bay from the rest of the under-seat area. I had previously measured off an area to fit a rolling plastic bin of the type you usually slide under a home bed, and that upright provided the perfect screw-in base for the divider. You can see the plastic bin in place for dry fitting in the photo immediately below.

I had to be careful when measuring and fitting everything, to leave room for the 1" insulation. I did decide not to insulate the floor on this side, since it was all being used for storage. I figured the stored items themselves might have some insulating value, and besides, I was still going to be insulating the underside of the bench seats.
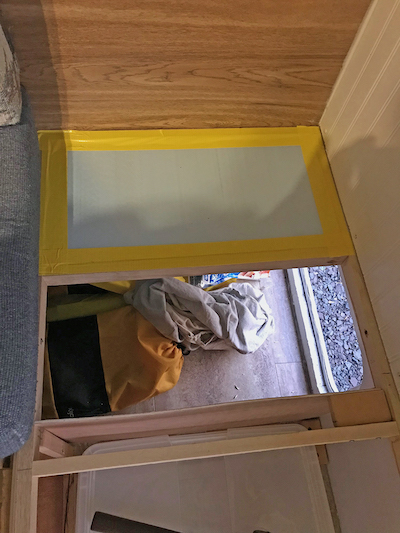
How I did that took some thought. I couldn’t just do the most straightforward thing: gluing the EPS panels to the actual seat top. Then it wouldn’t have settled properly onto the supports. So what I ended up doing was actually placing the panels between the crossbar supports. Though I cut them just slightly larger than needed so I could snug them into place to avoid them dropping out, I did use wide duct tape (yellow, of course!) to attach them from the top, just to make sure.
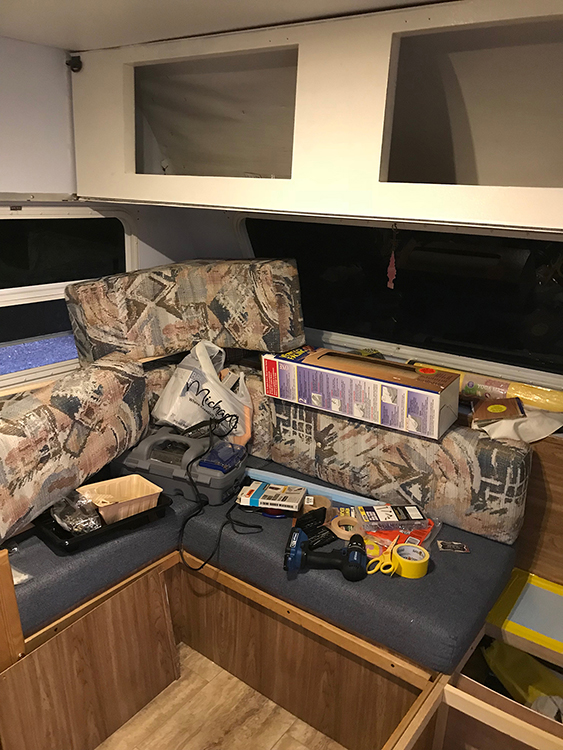
You might wonder what I did with all the other stuff that was already inside the rig. Since I’m still at home in my apartment, I’m lucky that I have most of it stored in there on my kitchen table right now. But there was still plenty of cushions, etc. to get out of the way, which was mostly accomplished by piling them onto the areas I wasn’t working on right then.
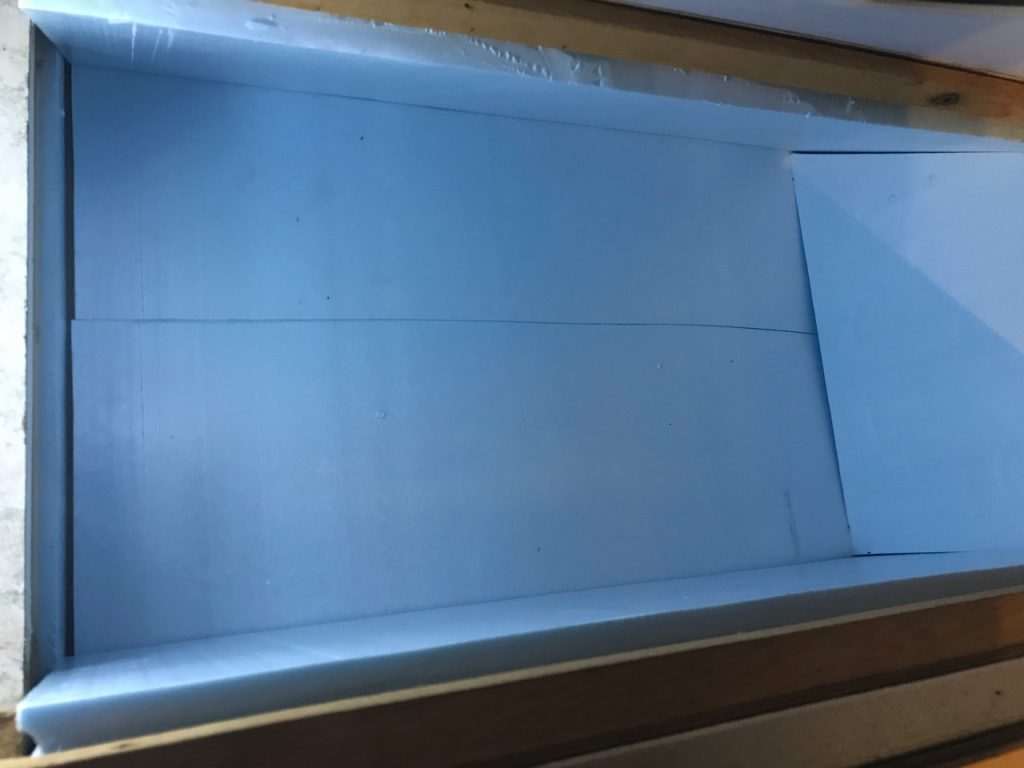
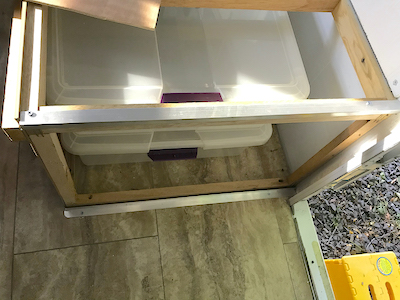
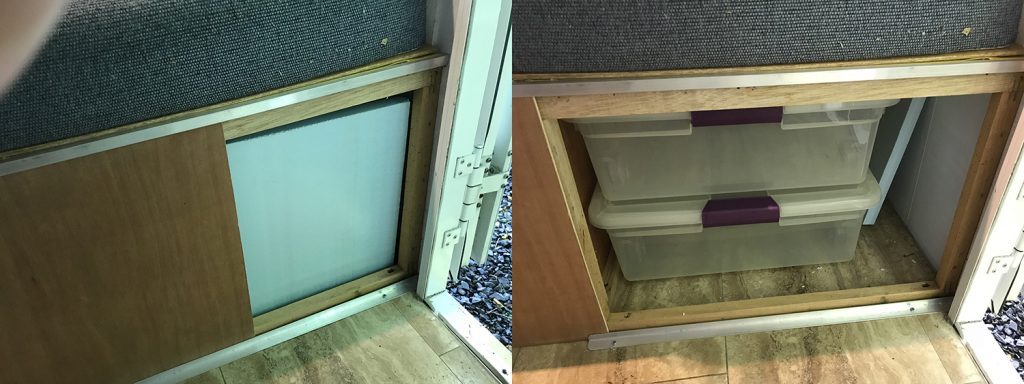
This is the view from the top of the plastic sliding storage bins I’m going to put in the back part of the starboard underseat area. I will only be insulating the outside wall and underseat top, to allow room to maneuver these bins in tight quarters when I want to slide them out.
Before I bought them, I made a dummy out of a stiff piece of corrugated cardboard the same size as the bins, and played with it to see if I could get it in and out of the compartment once everything was in place. I also carefully measured the depth of two bins stacked atop each other, to make sure the top insulation panel wouldn’t interfere with their sliding in and out. For the record, I would have sacrificed that top insulating panel to allow the bins to work. Storage was more important than the arguably negligible effect of that top panel.
The finishing touch was modifying the end panel from a fixed piece to one that I could slide out to access the bins. Again, the flimsy crap they used to make the original had seen better days and was warping anyway. I knew it wouldn’t last long under the onslaught of everyday life, especially since it was right by the door and would likely sustain a good bit of kicking and banging just from everyday traffic.
So I replaced it with more of that 1/4" luan, which I measured carefully, three times, before cutting it. I could have made a cardboard dummy of this piece, as well, but I felt very confident that if I just measured and cut carefully, that would be enough, and it was.
Since the new panel would be sliding and not fastened on, I had to figure out how to create a sliding mechanism. After spending some time thinking at the hardware store, I finally settled on fabricating my own out of aluminum L-stock. Some big box stores don’t have this stuff, and I didn’t feel like fooling around with it, so I went straight to a small neighborhood hardware store. They usually stock it in upright bins in an area where other hobby and crafting materials are displayed, and sell it in different lengths. I chose a four-foot length of 1" high stock.
I knew aluminum would be as strong as I needed, without adding too much weight (knowing I will be pushing the Jeep’s towing capacity already, I have obsessed over every pound I add to the rig during this remodel, which was a driving factor in every material choice I made). I also knew I’d be able to cut through it fairly quickly and easily using my Dremel with a cut-off wheel, which did work great.
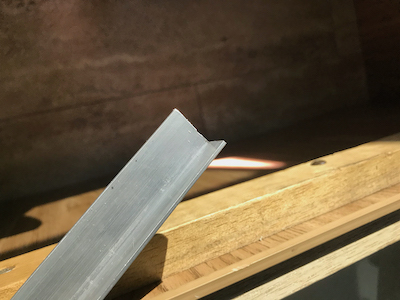
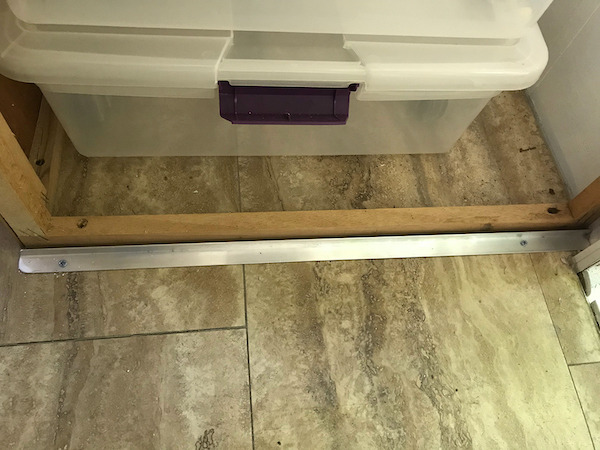
Once I had cut the top length of L-stock, I used a grinding wheel on my Dremel to smooth the cut and take the sharp angles off the corners. The I used my power drill-driver to drill screw holes in it where I would attach it to the top of the seat frame. You can see below the dummy panel I used as a spacer to make sure it would hang far enough over the edge of the top wood to easily accommodate the sliding panel. The trick was leaving enough room that it wouldn’t bind when sliding, but keeping it tight enough to create enough friction that it wouldn’t just come flying out during travel.
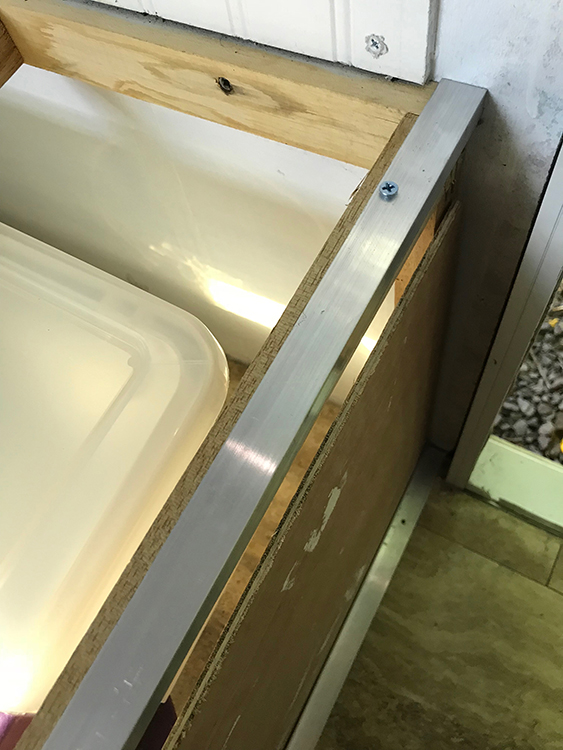
I did the same process to create the bottom channel, but this one screwed into the floor, so I was ultra-careful to measure accurately. I didn’t want to have to mess up the floor with too many screw holes. I also used the grinder to round off the corners facing outward, so no one would inadvertently cut their toes if barefoot. The opposite corners would be against the wall and not offer that same threat, so I left them square.
I then cut the sliding door panel, carefully sanding the edges and dry-fitting it in place. The careful measuring and fastening paid off. It fit perfectly and slid smoothly open and closed. I was very pleased.

Overall, this insulation and sliding door project was one of the most successful and satisfying I’ve done so far. It was one of those rare times things turned out almost exactly as I had envisioned them in my head. I think I will also thank myself later for investing the time and energy into these efforts. They’ll make a big difference in my comfort and convenience over the long haul. It may have been a bit difficult to imagine wanting to be insulated from the cold during 95° days with 80% humidity, but I know I’ll be glad I did.
Full disclosure: I am an Amazon Associate, so part of your purchase through some of the links or portals on this website will help support this site, at no extra charge to you. Thanks for helping me to help you and others by supporting my ability to provide this valuable safety information.
Recent Comments