
Having been out on the road a while now, I’m catching up on the remodel that got me here.
In an earlier post, I mentioned that I was adding some insulation, and this post is where I’m going to go into that in more detail.
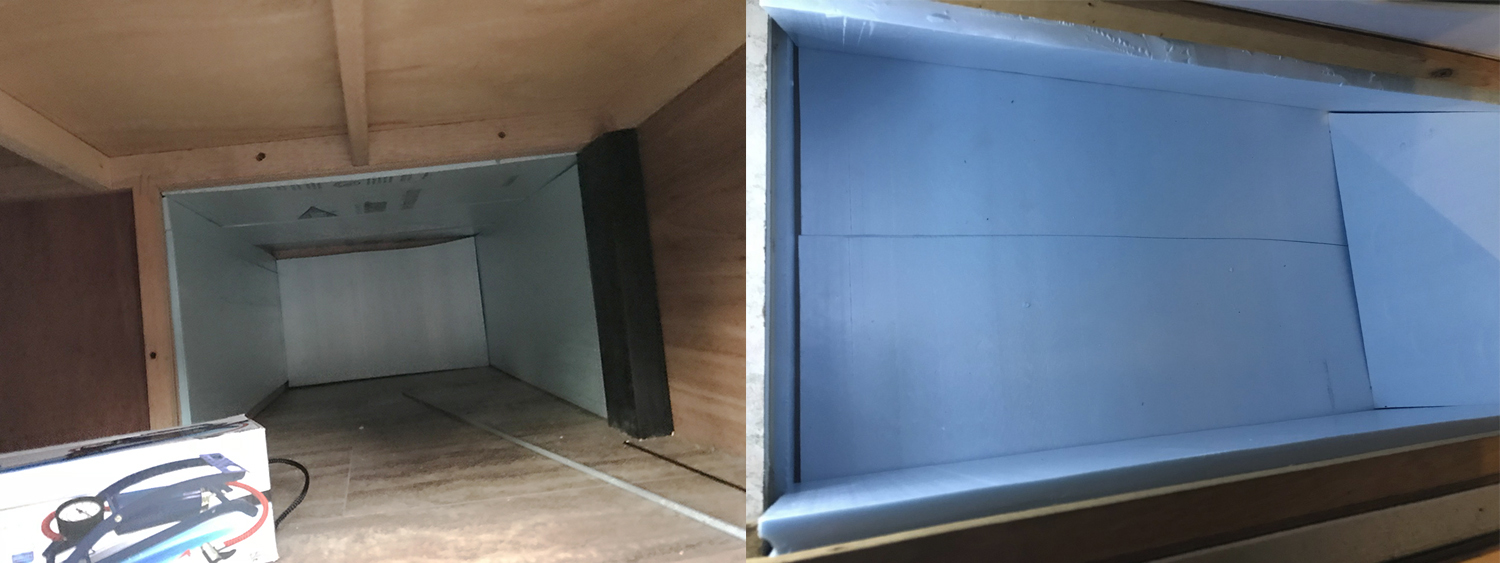
My trailer has its two 20 lb. propane tanks inside the front, beneath the large picture window. That means that inside, there’s a ledge that juts out into the cabin about ten inches or so. When I first looked at it, this ledge had a single, long top panel running the entire width of the cabin.
The original front ledge had certainly seen better days.
It was made of very thin, flimsy, 1/16″ luan that had developed a sag over the years (this is a 1996 Thor Prism M-20PG) toward the middle, something of an upward curl toward the edges, and there was a thin trim strip against the wall that had pulled away and was no longer serving any real purpose. It was ugly and I hated it, so I knew as soon as I got the chance, I would replace it; and the time had arrived to finally do that.
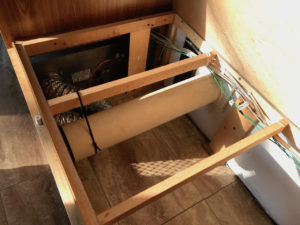
Ledge top removed
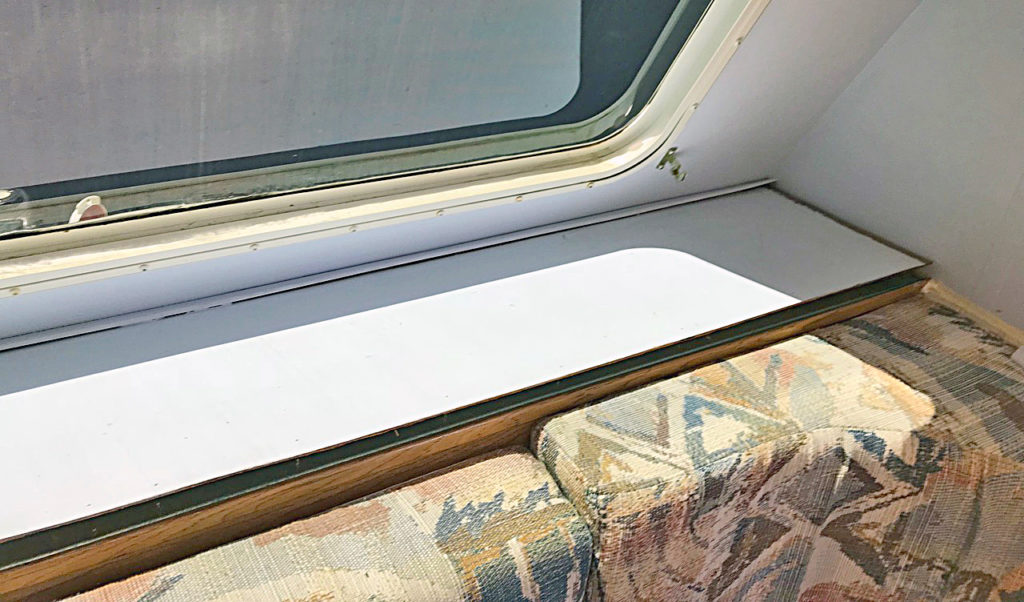
I will go into this particular section in detail when I talk about the wiring work. But for now, I mention it because once I removed the flimsy top panel, I could see that the void below, on either side of the propane compartment, went clear down to the bottom of the trailer.

The view from the top of the front ledge, starboard side, clear down into the corner storage bay below.
That means I could look down and see inside the two front “basement” storage bays, which are accessible through small, locking outside doors. These, in turn, connected to the two side bays amidships, accessible by two other doors. Those run some distance along each side, directly beneath the side dinette benches.
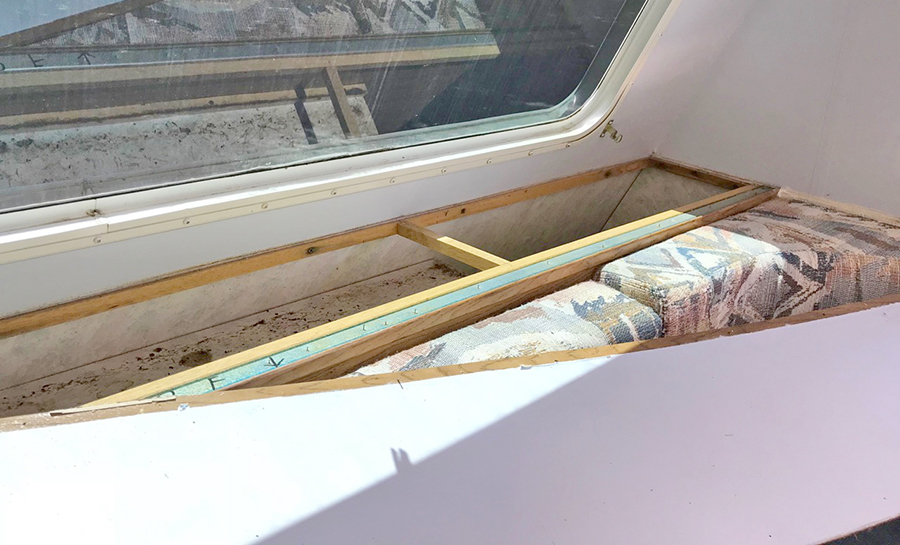
This is underneath the port side dinette seat. In addition to storage accessible either by lifting the seat cushions or through the outside bay doors, these areas also serve as a chase for electrical wires.
These benches essentially form the interior boundaries of the storage bay walls. This means the underside of the benches have some exposure to the cold and heat, as well as dirt and dust that inevitably sift through cracks as the trailer goes down the road.
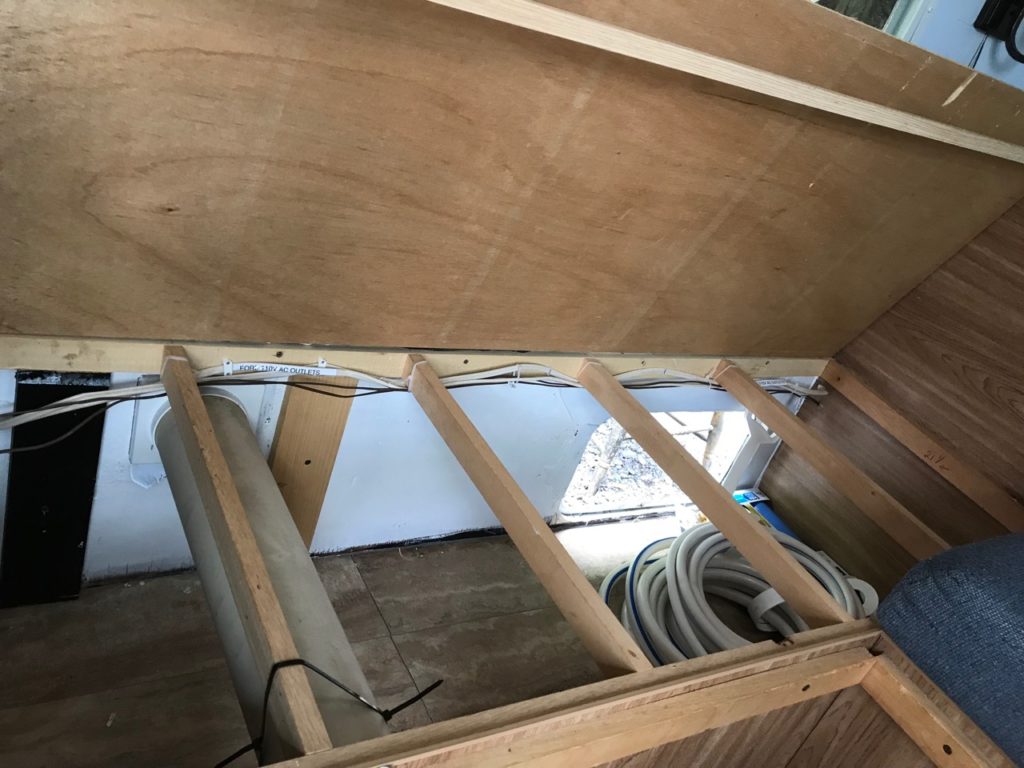
This PVC tube has a hatch that opens to the exterior, intended for storage of the black tank (sewage) drain hose. But newer hoses have attachments on the ends that preclude this usage, so I’ll be sanitizing it for other storage. I reinforced it with a black zip tie, to keep it from jumping up and down, loosening the outer hatch flange. I don’t need any unnecessary invitations for moisture entry/leakage.
I wanted to add some 3/16″ luan dividers between the front and side bays, both to isolate the contents from each other, keeping things cleaner, and to provide some interior walls to which I could attach some EPS (extruded polystyrene or styrofoam) solid insulation. Sorry, I didn’t get any photos of this work because my iPhone battery died, and I was too hot and tired to care.
The process of this bay segmentation lasted about two days. You can see in the photo below where the dividers are in place, and I’ve fitted the starboard under-bench storage area with a roll-out plastic bin. I ended up being able to stack two of these to make optimum use of the space, where I store my linens and blankets.
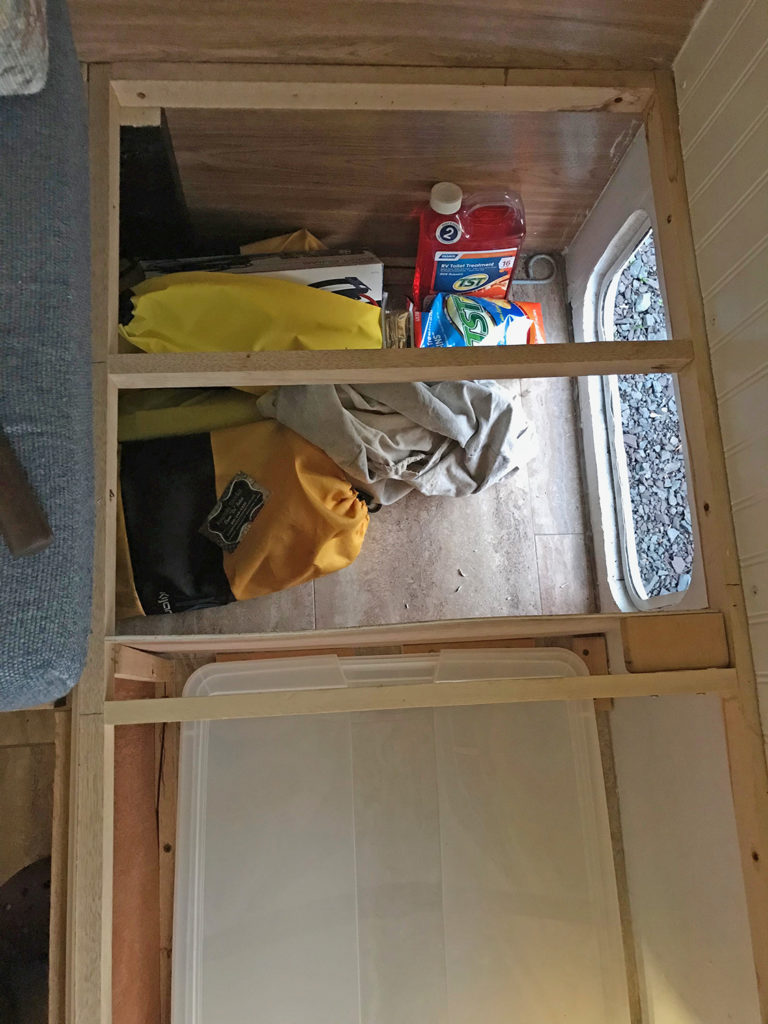
You can see the two segments of starboard storage here. At top is the part that passes beneath the middle dinette bench seat and, originally, went all the way through to the port hatch. I walled that off to keep things from moving around too much.
I also wanted to make it so that there was no pass-through between the front of the side storage, accessible through the outer side door, and the storage area under the dinette seat. This would reduce dirt infiltration, and I knew I was going to make it so I could more easily access the side part from the interior. I didn’t want to have to lift the dinette seat to access that storage beneath. I’d decided that I wanted to access that solely through a new door that I would create on the end of the dinette bench.
These rolling under-bed bins made perfect storage solutions for this odd space. In this photo, the trailer’s entrance door is at bottom right, and the bins slide out right there, when I pull the bench-end sliding door out, which I made from a 3/6″ piece of luan and a drawer pull.
I would make sure that new door would allow me to stack two under-bed, rolling plastic storage bins in that compartment. These could be pulled out as needed from below, rather than having to rearrange all the items that would be sitting on top of the bench in support of it serving as my office and workspace. And this would allow me to add a layer of 1-inch EPS rigid foam under the seat top itself, to help isolate the cold or heat from entering the living cabin.
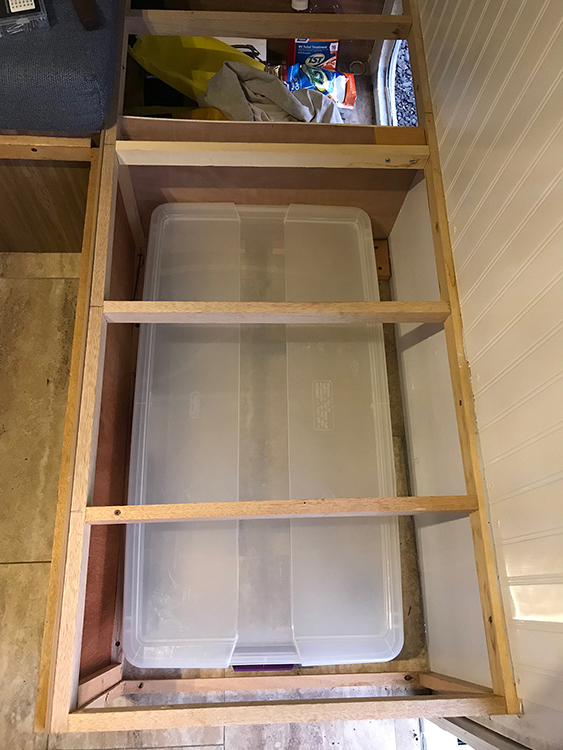
This shows how the two bins stack inside the bench storage. This worked out great, because I got a fantastic deal on four of the bins (less than I would have paid for one new one) on Letgo.com. I ended up selling the two extras at my yard sale, so I made money on that deal!
First, I’d have to insulate the bench top. For that, as well as the rest of my insulating work, I used 1″ EPS (styrofoam) panels, cut to size and duct-taped in place. Of course, because I believe things should be pretty when possible, I used beautiful, bright yellow duct tape instead of that ugly silver stuff. Costs the same and was much nicer to work with, too.
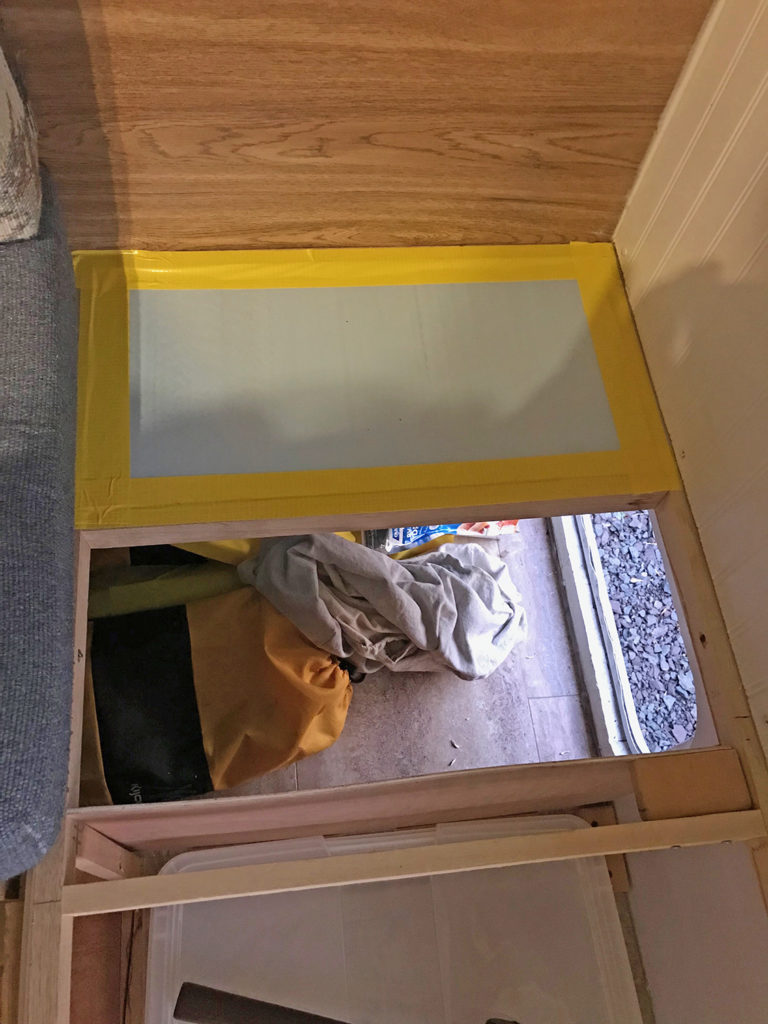
The first foam insulating panel installed under the bench top. I did this all the way around the dinette. I also insulated the outer walls with a layer of it, though they already contain the standard construction foam. Later, when things got cold, I was grateful I’d had the foresight and done the extra work.
Then I finished insulating the pass-through beneath the middle seat, the far forefront starboard storage compartment, and the starboard under-seat.

Left: Far forefront storage insulation finished. Right: Starboard under-seat insulation finished. Much of this was put in place purely by force of friction, and it has remained in place. Where I used duct tape, it served a double purpose of covering seams.
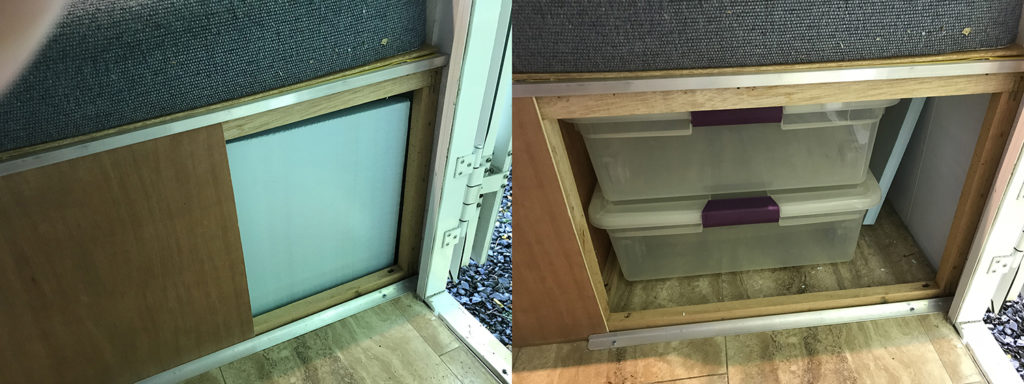
What I ultimately decided to do for access to the under-bench storage bins was to completely remove the flimsy, 1/8-inch luan bench end, and replace it with a sturdier 3/16″ luan. I knew I couldn’t use hinges on top, because the small space in front of the entry door would preclude my being able to see the contents from the top, eliminating the advantage of the roll-out containers.
Hinges on the bottom would get in the way of the bins rolling out. And hinges on either side would create an awkward swing situation, because that’s right where I’d be standing. So, after a bit of puzzling on it, I decided the best solution would be a sliding door that could be pulled out, away from the wall.
I gave a lot of thought to how it would work, and finally decided that I’d have to build channels to hold the bottom and top of the door in place and to guide it as it slid open and closed. After fruitless searches in several hardware stores and home centers for a ready-made solution, I finally gave up and bought a 5-foot length of L-shaped aluminum to make my own.
First, I cut the door out of the luan, so I could use it for measurement. Then I measured and cut two lengths of the aluminum L to fit the top and bottom of the bench.
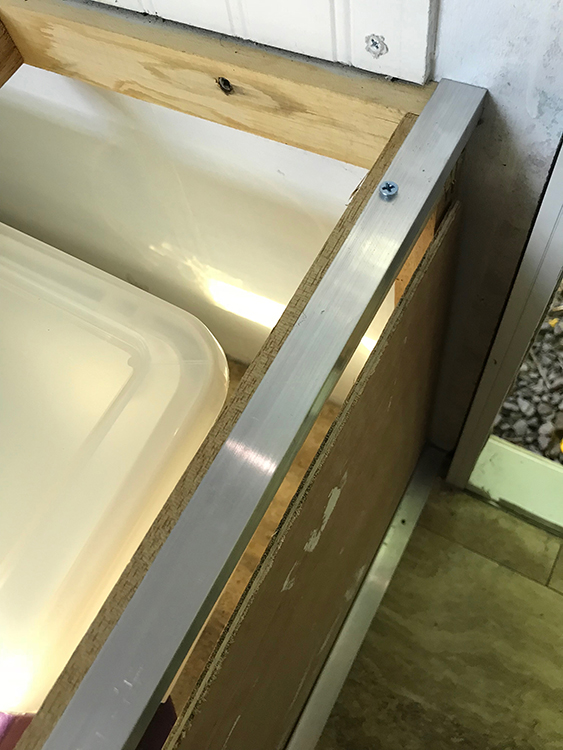
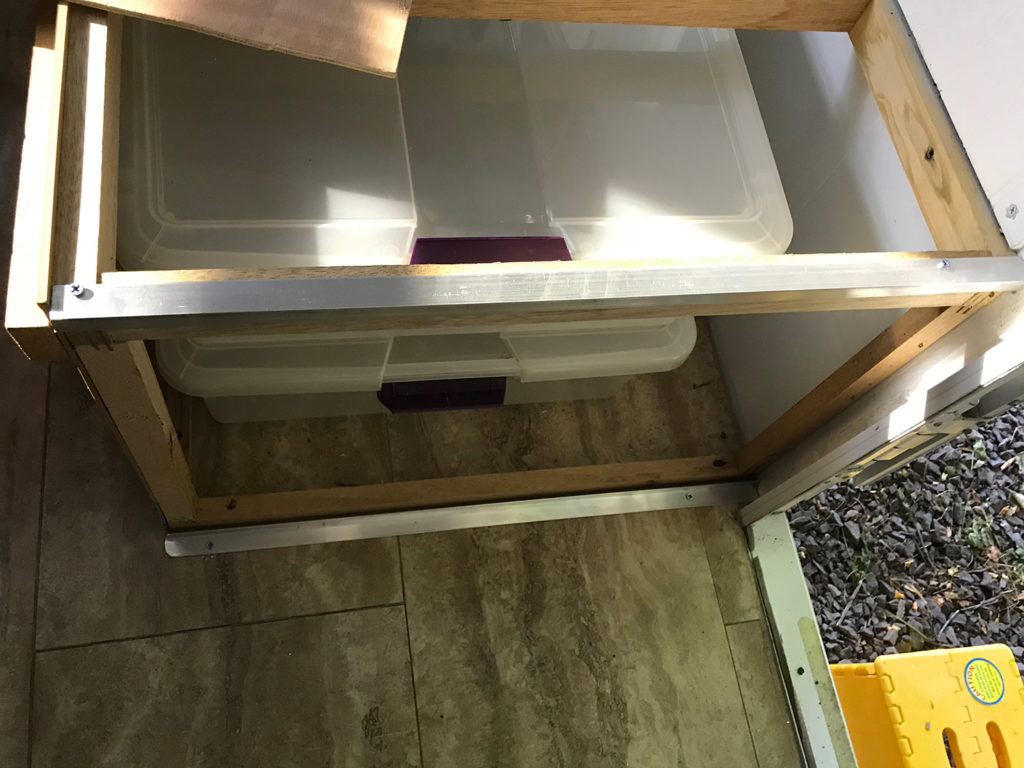
Here, I’ve cut and screwed into place a length of aluminum L-bracket to form a top channel for the sliding door, by affixing it so it hung over the edge by 1/4″, allowing enough room for the 3/16″ luan to slide easily.
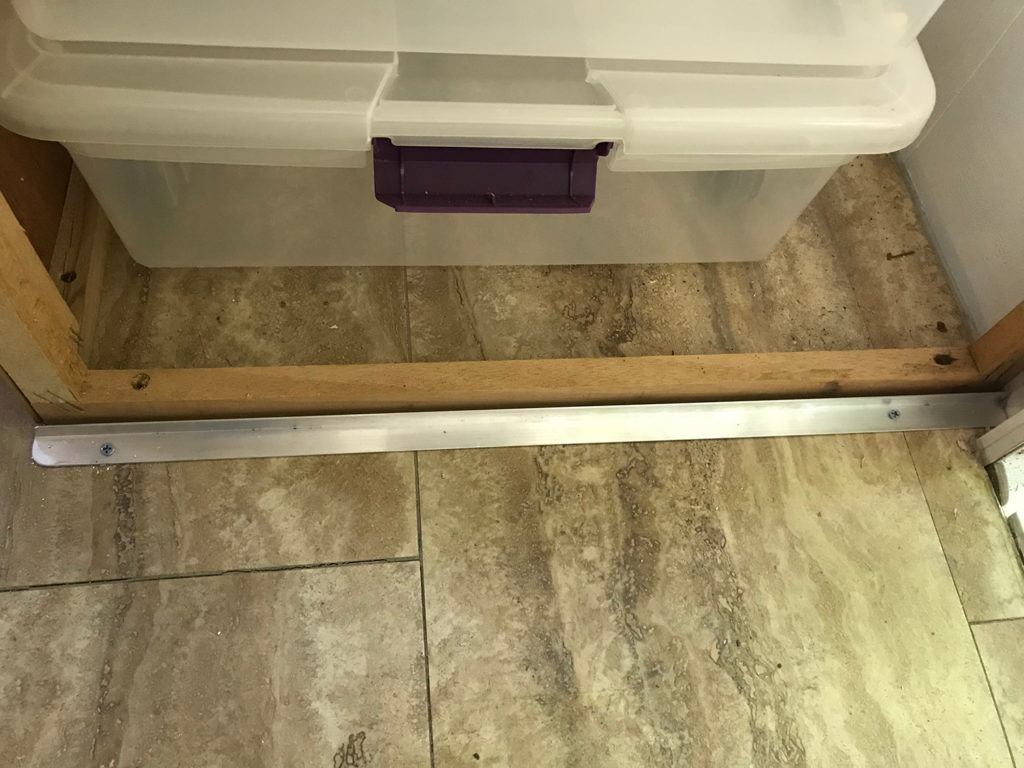
This view shows the bottom channel, with its sharp edges rounded off, fixed in place.
To make sure I wouldn’t end up slicing a toe open on the bottom guide channel (and believe me, if something sharp is on or near the floor, my toes WILL ultimately find it), I used a grinding wheel on my Dremel tool to round off the outer top corner. Then I switched out to a small drill bit on the Dremel and drilled several holes along both lengths for screw holes to attach them to the bench edges.
After that, it was a simple matter of fitting the door in place to make sure everything moved smoothly. I was concerned with it staying that way, when my friend Gloria suggested I rub the edges with candle wax. Brilliant! I did so, and the door has functioned perfectly ever since!
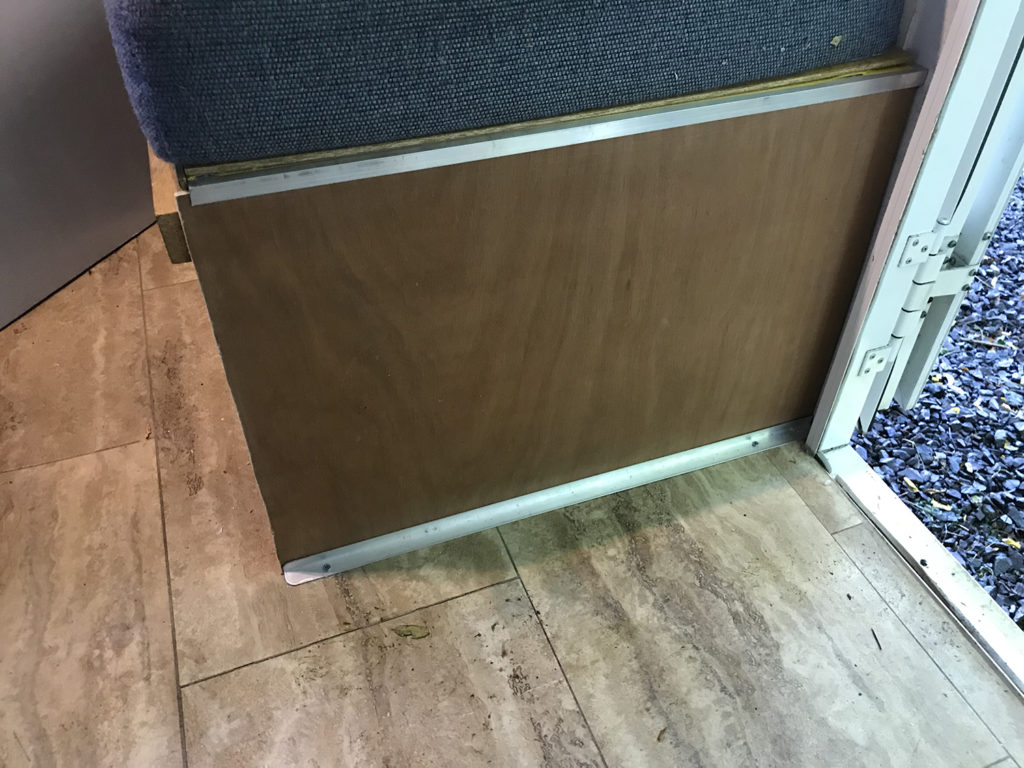
This shot shows the sliding door in place, minus its final coat of paint and handle.
I cut a piece of insulation panel to fit between the end of the bins and the door, but that ended up being a pain to keep pulling out and putting back, so it sits in the compartment. I leave it there in case things get really chilly, in which case I’ll move it back in place.
Left: Sliding door partially open to reveal the styrofoam end panel. Right: Door fully opened with end panel tucked on the side, which is how I ended up actually using it.
For the length of this entire job, which took me about a week of evenings and weekends, I had a little supervisor. One of the feral cats (oh, how I miss them!) took an interest and laid just to the side of the rig while I worked on it.
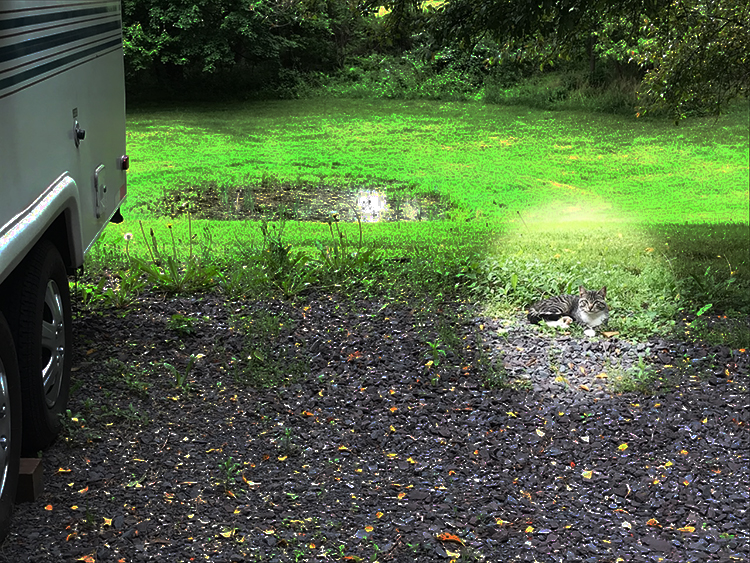
My little feline supervisor!
Those were some long, hot, humid days, especially working in such close quarters. But they were worth it, as both the temperature and sound-deadening qualities of the insulation have been much appreciated. And that slide-out door and rolling storage bins were some of my best ideas for making the most of this small space.
Mary…you never cease to impress and amaze me!! Job well done!
Thank you!
You ought to brand yourself as the “mobile maven” who can fix just about anything associated with recreation vehicles. Ha!
Thanks, but not a chance. I know SO little compared to everything there is to know. But I AM resourceful, and that’s a great help!
I am truly in awe of the things you are doing! Xoxo
Cathi, thank you!
I love your innovative spirit and can-do attitude!
I love reading your posts and updates! Your problem solving is incredible! Keep us all updated! 🙂
Thanks, Donna!
Resourcefulness runs through the women in our family, no? 😉