
This is the last in the four-part series about the massive initial installation and upgrade of Wildheart’s electrical system. It’s really mostly just about lighting.
You see, I have never, ever liked overhead lighting. Even the prettiest, most well-designed chandelier ultimately makes everything feel blown-out, harsh, and ultimately (to me, at least), kind of ugly — unless the lights are on dimmers, in which case the effect can be quite dramatic and charming.
But there are no chandeliers that I’ve ever seen in RVs. Can you imagine all the smashed pieces as everything jolts around during travel? So I opted instead for sidewall lighting, which is much softer and well-aimed.
I wasn’t interested in super-bright LED fixtures that come off as surplus nightclub lighting. I wanted soft and warm, comfortable for reading or just having a good conversation. Having looked at several RV catalogs and real rigs at shows, I knew there were several styles of wall sconces available.
I chose a modified Craftsman/Art Deco look in the upside-down tulip glass shades I picked. Actually, they were meant to be positioned with the opening at the bottom, but I both liked the look better with it on top, and knew that pointing the opening up would soften the light quality and diffuse it a bit, so it wouldn’t look harsh or be too hard on the eyes for reading.
I lucked out to discover that eTrailer.com had just the style I was looking for on clearance, with both sconces costing me under $30, including shipping. Yay, me! The only problem was that even though they came with the ideal hammered-metal finish I loved, it was a silver/pewter look. The rest of my new fixtures were oil-rubbed bronze. Though I could make a hammered copper look work, the silver just wasn’t gonna cut it. I ordered them anyway, figuring I could spray point them if necessary.
When they arrived, I just loved them, and couldn’t wait to get them installed! But what WAS I gonna do about that color? I realized that spray paint would essentially cover up that beautiful hammered finish. AHA! Brainstorm! I remembered a dark orange permanent marker I’d had for years, and for which I was unable to find any other use. If I ran it over the top of the metal finish, it was transparent and theoretically would transform the silver to copper, while allowing the hammered look to show through!
I did a small test patch on the bottom of the fixture, where it wouldn’t show if it really looked hideous. But whoa! It turned out PERFECT! And if I added a second coat on top of the first, it really pushed the orange color down to bronze or copper, and that was exactly what I was looking for! So, when finished, they looked like they exactly fit in with the rest of the fixtures, for not one penny extra in cost, and very little extra effort. I was so pleased! I do worry that direct sunlight may fade them over the years, but hey—that’s what Sharpies are for.
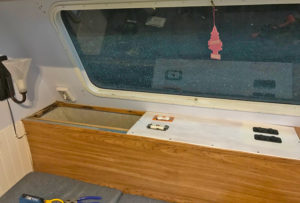
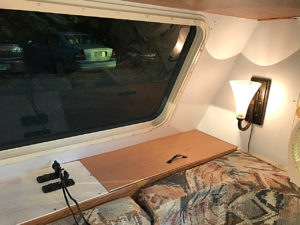
You can see where I was working in the port side ledge bin to splice the wiring into the new 12v charger port lines.
Since they were going to be wired into the 12-volt system run by my batteries, I simply tapped into the wires I ran into the console at center front on the ledge. That made it very easy to run the wires out the deck and up the wall just a bit, all easily concealed with a vinyl wire chase to create a clean, finished look.
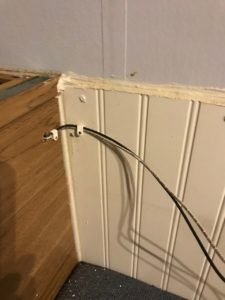
This view shows how I ran the sconce wires out of the front of the ledge bins. These holes get covered by the cushions, and eventually by self-stick vinyl wire chases.
I knew that I would later be hanging the wallpaper, so when I was locating the holes, I was okay about drawing guidelines on the wall. They would be covered up later, but I was careful to just use graphite pencil that wouldn’t later bleed through the wallpaper glue.
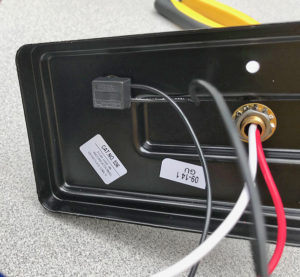
Luckily, there wasn’t anything challenging about these simple circuit hookups. That little black box is the switch, which is a push-botton on the front. I like these types of switches because they’ll stand up to a lot of use.
The wiring itself was pretty simple and straightforward, though different manufacturers use different color coding for their wires. Black and white, black and red, red and white — and nothing is standard, not even which line is negative for grounding. So there’s some guessing and not a little praying, unless you have a circuit tester, which I do, but don’t really know how to use!
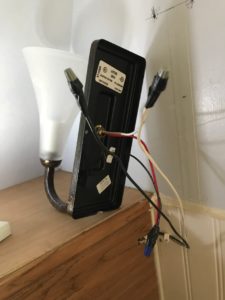
This is the finished wiring on the starboard side sconce, before mounting to the wall.
I used standard plastic wire nuts to connect each splice, and covered that with electrical tape for good measure. Can’t be too careful with electricity!
Mounting the fixtures to the wall was a matter of two screws in pre-drilled holes. I began with matching bronze-tone screws, but later would have to replace them with more heavy duty fasteners as constant travel revealed that pretty isn’t necessarily the most important facet. They both shook loose several times before I stopped fooling around and put some thicker, longer-shanked pan head screws in. Those did the trick, and I haven’t had to deal with any more loose stuff happening with either sconce.

I must admit to feeling pretty proud of how nice these looked when finally mounted.
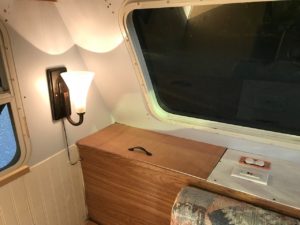
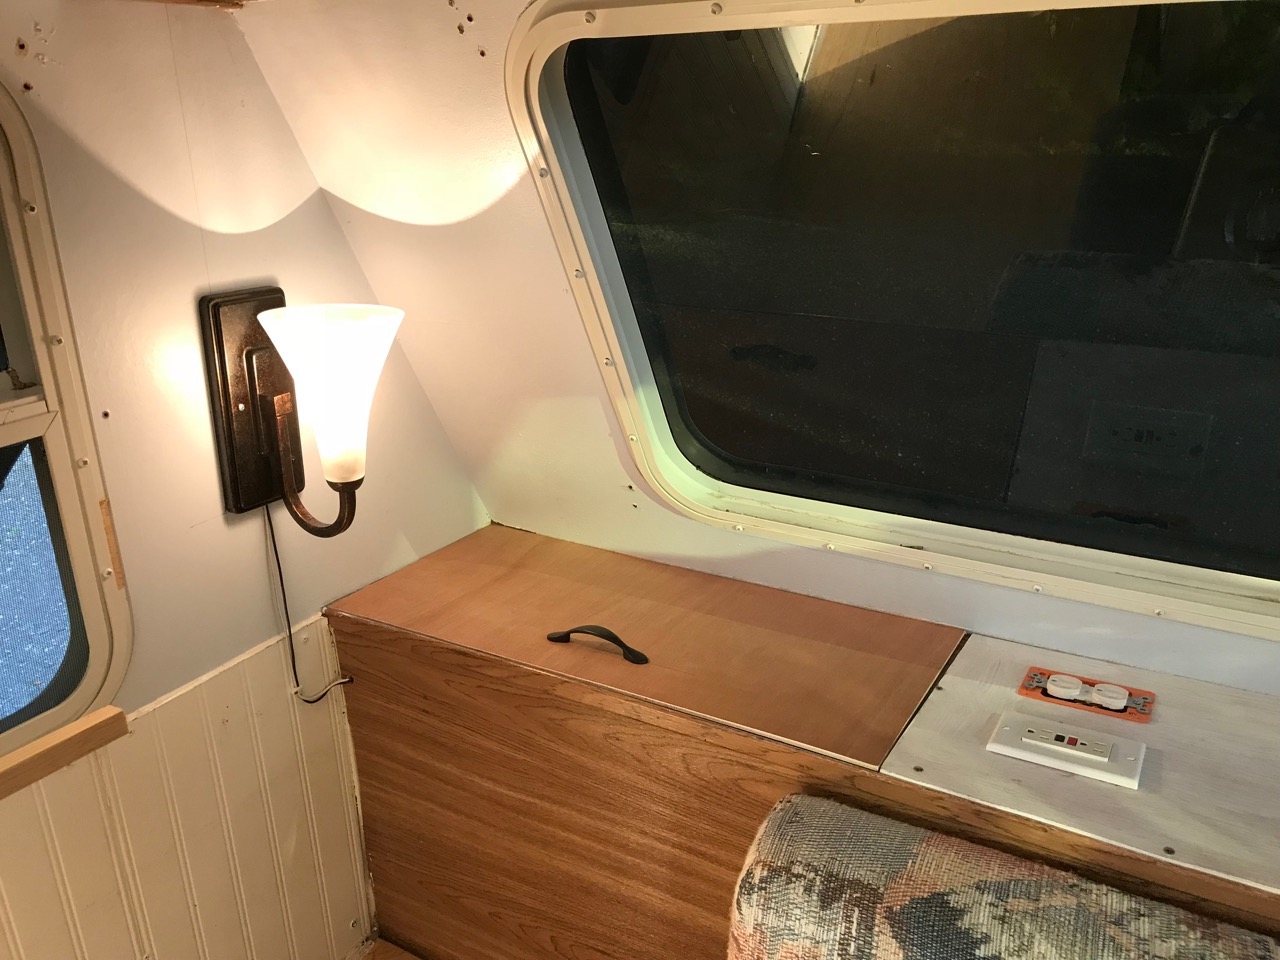
Port side sconce mounted and lit — beautiful!
Once I got both fixtures mounted, I couldn’t wait till night fell so I could see what kind of light they cast. It didn’t take too long, since it had been a long day of installation, before I could turn them on and see if my work was done right.
There was a bit of a fumbly struggle to replace the supplied incandescent bulbs with the brighter, far more efficient warm white LED bulbs, but in the end, the soft but clear light quality was worth it.
Even without the painting or wallpapering done, I could see clearly that the light quality would be exactly what I’d hoped for. I was so happy with these!
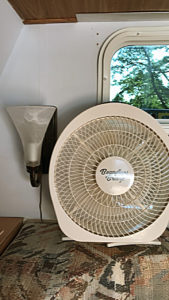
Never underestimate the importance of comfort while you work!
One nice thing about this installation was that, since the 12v wiring was already in place, I didn’t have to sweat my patoot off. I was able to plug in my 12v Boundless Breeze fan to keep the previously stultifying air moving and some semblance of comfort in the sweltering mid-90s temperatures with 85%+ humidity. What a welcome relief that was, and being done with the electricity for a while was even more!
And finally, I could move on to other interior work. Finis!
Loved the site and advice Mary. Was fun talking with you at Quartzsite with my wife, Louisa and dog Sugar.
Michael, thank you! I’m so glad you found it helpful! And it was fun meeting you and Louisa and Sugar. Hope to see you again down the road!